Quantcast
Viewing all 154 articles
Browse latest View live

Macsolar Solar Inverter Fault Light

Is your Macsolar Solar Inverter Fault light on?

[contact-form-7]Image may be NSFW.
Clik here to view.
Macsolar Solar Inverter Fault Light

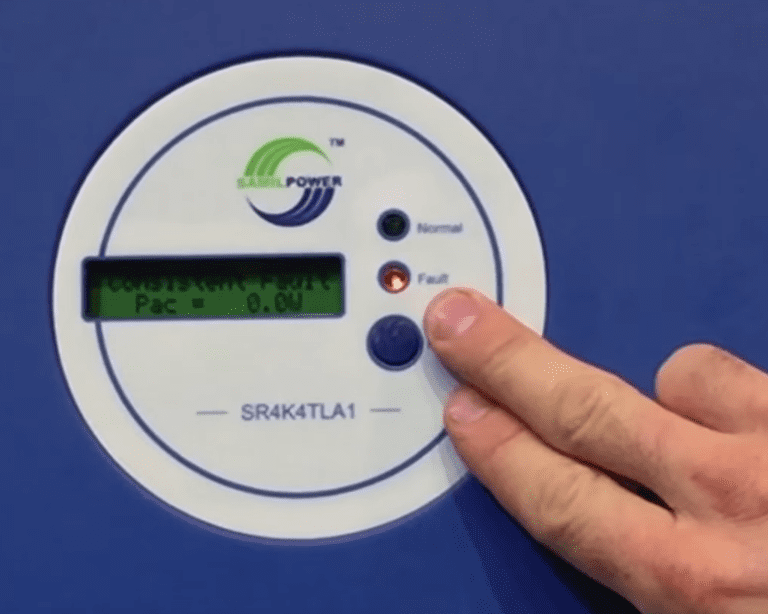
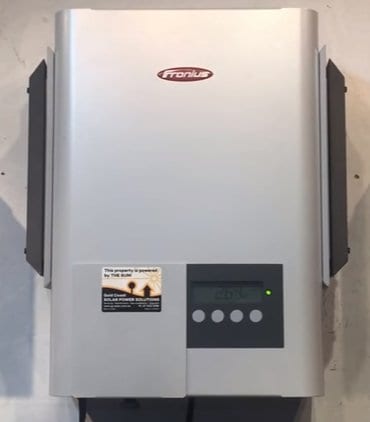
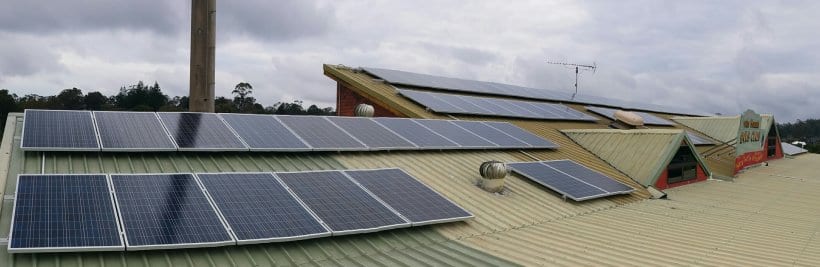
Here at Gold Coast Power Solutions we have seen a number of cases where Macsolar solar inverters have the red fault light lit when the system should be operational.

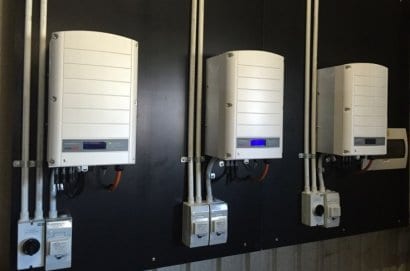
If working properly, the inverter should display a green power light and a yellow run light. With the fault light issue, although the green power light is on you’ll also notice that the red fault light is lit as well and the run light is not on.

This means that your inverter is still detecting DC solar power from the roof but it has also detected a fault with the system.

As soon as you notice this issue with your Macsolar solar inverter you want to do something about it because the system is not working at all.

Troubleshooting a Macsolar Solar Inverter Fault Light

In this situation, try to restart the inverter by following the system shutdown procedure.

  1. Turn off the SOLAR SUPPLY MAIN SWITCH located in the switchboard.
  2. Turn off the PV ARRAY DC Isolator beside the inverter.
  3. Wait for approximately 30 seconds to 1 minute.
  4. Turn on the SOLAR SUPPLY MAIN SWITCH.
  5. Turn on the PV ARRAY DC Isolator.
  6. Wait until the power light is on.

Unfortunately the Macsolar company is no longer in business which means that warranty claims are no longer possible for any Macsolar inverter. If restarting the inverter hasn’t solve this issue, the next two options are:

  1. Repair the inverter, or
  2. replace it.

If you choose to go for the first option (repairing the inverter), it may well cost over $500. This will still leave you with an inverter ofinferior quality and no warranty, so it may be best to choose to have the Macsolar inverter replaced with a quality replacement unit.

We recommend replacing the inverter with a quality replacement unit with a full warranty, if you require further assistance with Macsolar Solar Inverter Fault Light, just fill in the form on this page with your details and we will be in touch.

Click here to get your solar power system back saving you money rather than costing you money!

Got A Question About Solar Power? Click Here For Answers!

The post Macsolar Solar Inverter Fault Light appeared first on Gold Coast Solar Power Solutions.


KLNE Sunteams Solar Inverter – High Temperature Error

Is your KLNE Sunteams Solar Inverter showing a High Temperature Error?

[contact-form-7]Image may be NSFW.
Clik here to view.
KLNE Sunteams Solar Inverter High Temperature Error

KLNE Sunteams solar inverters should last longer than 5 years. However, a lot of factors may affect its efficiency. We, at Gold Coast Power Solutions, have seen that a common issue for KLNE Sunteams solar inverters is a failure on its temperature sensor.

On hot days KLNE Sunteams solar inverters can be affected by the high temperature if they are installed in full sun, and in these conditions they may display a high temperature error if it gets especially hot. In this case the red fault light on the inverter would be lit as well – this is normal behaviour for the KLNE Sunteams inverter if it’s overheating. If it’s not a hot day and your inverter and your inverter is baking away in the full sun and you’re still getting a High Temperature message coming up on the screen then your solar power system is not producing any power and most likely has developed an issue that needs looking into.

Causes of a KLNE Sunteams Solar Inverter High Temperature Error

As already has been discussed if the inverter is in full sun on a very hot day then it may display this error; if the error clears when it cools down then your best course of action would be to try and protect the inverter from the high temperatures.

If your KLNE Sunteams solar inverter is showing the High Temperature message and it is quite cool, it’s most likely that there’s an internal issue with the temperature sensor in the inverter. This causes the temperature sensor to incorrectly detect an issue and display the High Temperature reading.

How do you troubleshoot high temperature reading on a KLNE Sunteams solar inverter?

First, try rebooting your solar inverter. Make sure to follow the proper shutdown procedure:

  1. Turn off the SOLAR SUPPLY MAIN SWITCH or Inverter AC Isolator.
  2. Turn off the PV Array DC Isolator located at the inverter.
  3. Wait for approximately 1 minute.
  4. Turn on the AC Isolator.
  5. Turn on the PV ARRAY DC Isolator.
  6. Wait until the green Power light is on.

If the issue persists, you will need to contact a solar accredited electrician to have a look at your KLNE Sunteams Solar Inverter High Temperature Error issue.

If you need any further assistance with your KLNE Sunteams Solar Inverter High Temperature Error issue, we can help! Just complete the form on this page with your details so our team can provide you with further assistance.

Click here to get your solar power system back saving you money rather than costing you money!

Got A Question About Solar Power? Click Here For Answers!

The post KLNE Sunteams Solar Inverter – High Temperature Error appeared first on Gold Coast Solar Power Solutions.

Samil Solar Inverter SCI Failure

Is your Samil Solar Inverter Displaying SCI Failure Message on its screen?

[contact-form-7]Image may be NSFW.
Clik here to view.
Samil Solar Inverter SCI Failure

If an ‘SCI Failure’ message is being displayed on your Samil inverter screen and the red Fault light is lit the inverter is telling you that there has been an MCU internal communication failure.

This is an internal fault inside the inverter, and while it’s showing the SCI failure message your solar is not working – you need to take action as it’s costing you money!

How do you troubleshoot a Samil Solar Inverter SCI Failure?

If you have an SCI failure error on your Samil solar inverter here’s what you can do:

Try to reboot the system to see if that clears the error and gets the system back in action again. Just make sure to follow the proper shutdown procedure as follows;

  1. Turn off the SOLAR SUPPLY MAIN SWITCH or Inverter AC Isolator (if installed).
  2. Turn off the PV Array DC Isolator located at the inverter.
  3. Wait for approximately 1 minute.
  4. Turn on the SOLAR SUPPLY MAIN SWITCH or AC Isolator (if installed).
  5. Turn on the PV ARRAY DC Isolator.
  6. Check to see if this clears the error.

If the above steps fail and the Samil Solar Inverter SCI Failure issue persists, the first thing to do is check if your inverter is still covered under the 5-year manufacturers warranty. If it’s outside the warranty period you will need to get the inverter repaired or replaced: we recommend replacing it with a good quality replacement unit that comes with a full warranty. Repairing the inverter will cost hundreds of dollars and still leaves you with no warranty and a product that could have an issue again next week – better to pay a little more and get the peace of mind of a reputable companies product and warranty.

If you need further assistance with your Samil Solar Inverter SCI Failure issues just complete the form on this page with your details and our team of solar inverter experts will be in touch to provide you with further assistance.

Click here to get your solar power system back saving you money rather than costing you money!

Got A Question About Solar Power? Click Here For Answers!

The post Samil Solar Inverter SCI Failure appeared first on Gold Coast Solar Power Solutions.

Latronics Inverter Dead – No Red Lights On

Is your Latronics Inverter Dead (red lights not lit)?

[contact-form-7]Image may be NSFW.
Clik here to view.
Latronics Inverter Dead

One of the common issues we come across at Gold Coast Power Solutions with Latronics inverters is when they are totally dead – none of the 4 red lights are on. When the sun is shining, the first gauge to see if the Latronics inverter is working is to see if the red light on the 25% power level indicator is, at the very least, lit.

If you check your Latronics inverter when the sun is out and find that there’s no red lights on at all it means that the Inverter is not producing any power – something needs to be done straight away to get your solar power system back saving you money!

What to do with a Dead Latronics Inverter – no Red Lights

When this happens, check the following first:

  • Check that the DC circuit breaker on the inverter is turned ON, and
  • The 2 plugs on the right hand side of the inverter are plugged in.

If either of these if off or unplugged, turning them on or plugging the plugs into the inverter should immediately resolve the issue.

If you are still having issues with your Latronics inverter you will need a solar accredited electrician to look into why the inverter isn’t working. If you are near the Gold Coast leave your details on the form on this page.

We will check the inverter is receiving power from the solar panels, if there is DC power at the plug from the solar panels the issue is most likely with the DC circuit breaker built into the inverter. The Latronics inverters have a 5 year warranty so if the issue is with the inverter and it was installed within the last 5 years it may be a warranty claim, if not there is a number of different options to consider.

Click here to get your solar power system back saving you money rather than costing you money!

Got A Question About Solar Power? Click Here For Answers!

The post Latronics Inverter Dead – No Red Lights On appeared first on Gold Coast Solar Power Solutions.

Samil Solar Inverter Consistent Fault

Do you have a Samil Solar Inverter Consistent Fault issue?

[contact-form-7]Image may be NSFW.
Clik here to view.
Samil Solar Inverter Consistent Fault

When we troubleshoot Samil solar inverters at Gold Coast Power Solutions, one of the issues we commonly encounter is a “Consistent Fault” message displaying on the screen of the inverter; when this message is showing the red fault light is lit as well.

If you are seeing this message it means your Samil solar inverter is not working so you should act on it without any delay.

What can you do to troubleshoot your Samil Solar Inverter Consistent Fault issue?

When this happens, the first thing you can do is to try to reboot the system by following the instructions below:

  1. Turn off the SOLAR SUPPLY MAIN SWITCH on the switchboard or Inverter AC Isolator (if present).
  2. Turn off the PV Array DC Isolator located at the inverter.
  3. Wait for approximately 1 minute.
  4. Turn on the SOLAR SUPPLY MAIN SWITCH and / or AC Isolator (if present).
  5. Turn on the PV ARRAY DC Isolator.
  6. Check if this clears the error.

If this procedure does not work, check if the inverter is still within the 5-year warranty from the installation date. Look for the model number and serial number on the side of the inverter and have it repaired under warranty. If it’s outside warranty, the best option is to replace the inverter with a new model – a new inverter costs a bit more than repairing a faulty unit but gives you the peace of mind of a full warranty – you could spend hundreds of dollars to repair your faulty inverter and it may develop another fault next week and your still not covered.

If you need further assistance with your Samil Solar Inverter Consistent Fault issue, just complete the form on this page with your details so our team can provide you with immediate support.

Click here to get your solar power system back saving you money rather than costing you money!

Got A Question About Solar Power? Click Here For Answers!

The post Samil Solar Inverter Consistent Fault appeared first on Gold Coast Solar Power Solutions.

Sunny Roo Inverter Er00 Error Code

Er00 Error Code on Sunny Roo Inverter

[contact-form-7]Image may be NSFW.
Clik here to view.
Sunny Roo Inverter Er00 Error Code

It is quite a common issue here at Gold Coast Power Solutions to see faulty Sunny Roo inverters, one of which is the Er00 error code. With this issue, the Er00 code is displaying on the screen and the green light will be flashing intermittently. If working properly, the green light should be constantly lit.

According to the Sunny Roo manual this error is due to the inverter being in soft start procedure, but the DC Bus cannot reach and maintain anticipative charging voltage. In layman’s terms, the solar inverter is not functioning properly and it needs to be fixed ASAP.

What can you about a Sunny Roo Inverter Er00 Error Code issue?

The first thing to do is try rebooting the system, it’s important to carry out the shutdown procedure as follows;

  1. Turn off the AC Solar Supply Main Switch located in the switchboard or the Inverter AC Isolator at the inverter.
  2. Then turn off the DC PV Array Isolator locator next to the inverter.
  3. Wait for approximately 1 minute.
  4. Turn on the AC Solar Supply Main Switch or Inverter Isolator.
  5. Turn on the DC PV Array Isolator.
  6. Check if this clears the error.

Unfortunately, since the Sunny Roo and Beyond Building companies are no longer around, the warranty is no longer valid if this issue persists. Although you can potentially get the inverter repaired, you will still have to pay quite a bit of money to do this and you’ll be left with an inverter of inferior quality without any warranty.

At Gold Coast Solar Power Solutions we recommend having the faulty Sunny Roo inverter replaced with a good quality inverter that will operate for years to come and be covered by a full warranty, giving you peace of mind for years to come.

If you need further assistance with your Sunny Roo Inverter Er00 Error Code issue, please complete the form on this page with your details and we will be in touch.

Click here to get your solar power system back saving you money rather than costing you money!

Got A Question About Solar Power? Click Here For Answers!

The post Sunny Roo Inverter Er00 Error Code appeared first on Gold Coast Solar Power Solutions.

Sharp JH1600 Inverter d-21 Fault

D-21 Faults on Sharp JH1600 solar inverters

[contact-form-7]
Image may be NSFW.
Clik here to view.
Sharp Inverter with d-21 error code

Have you just walked past your Sharp JH1600 solar inverter and been greeted with a d-21 fault on the screen?

Unfortunately the d-21 error is a major internal fault with the inverter and the official response from Sharp to this code is: “the d-21 fault is caused by excessive voltage transients on the input or output of the inverter.

It is highly likely that an external factor such as Lightning or Power surge on the Grid is the root cause of this issue. These type of faults may be covered by Domestic Home Insurance.”

d-21 Fault – Not Covered by Sharp’s Warranty

So you can pretty much read into this that it’s a fault that Sharp will not cover under warranty, unless your Sharp JH1600 inverter was installed by Origin as they may do something about it – although I wish you luck with getting anything to happen quickly with Origin!

Sharp d-21 Fault – What To Do

If your Sharp JH1600 inverter was installed by someone other than Origin or you have given up on receiving decent service from Origin the best thing to do is replace the faulty inverter with a quality 1.5kW solar power inverter. We recommend the Fronius Galvo 1.5 as a nearly bulletproof replacement unit with a long 10 year parts warranty that is perfectly sized to replace the Sharp JH1600.
Image may be NSFW.
Clik here to view.
Sharp JH1600E inverters d-21 fault codes

As also mentioned in Sharp’s response the d-21 fault code is usually caused by lightning or a power surge from the power grid. If you are on the Gold Coast or Brisbane Gold Coast Solar Power Solutions can certainly help you get your solar power system fully operational again ASAP, why not contact us now to get the ball rolling? If you are somewhere else around Australia please leave your details as well as we can put you in contact with a reputable local solar power expert.

Click here to get your solar power system back saving you money rather than costing you money!

Got a d-21 fault on your Sharp inverter? Click here to learn about the quality replacement inverters we recommend.

Got A Question About Solar Power? Click Here For Answers!

The post Sharp JH1600 Inverter d-21 Fault appeared first on Gold Coast Solar Power Solutions.

Fronius inverter STATE 516 fault code

Fronius solar inverter displaying a STATE 516 message?

[contact-form-7]Image may be NSFW.
Clik here to view.
Fronius STATE 516 warning message

As a Fronius service partner one of the most common error messages we see on Fronius IG 40 and IG 60 inverters is the STATE 516 error code. The STATE 516 code is a general warning message and signifies that one of the power stages in the inverter has exceeded the permitted limit of error messages per day (>50x). What we need to know is what the actual error message is that has triggered the STATE 516 warning message.

Finding the error causing the STATE 516 warning message

To further locate the cause of the STATE 516 warning message you need to do the following:

  1. Go to the SETUP menu on the Fronius inverter
  2. Press ENTER (4th Button from the Left)
  3. Scroll down the list of options until you find STATE PS
  4. Press ENTER
  5. If you have been having a STATE 516 message on your inverter most likely you will now see the message STDBY PSOO. This means that the first power stage set (PS00) is on Standby mode – it’s not producing any power.
  6. Press ENTER
  7. The inverter should now show STATE LAST and scroll to the last shown STATE code on power stage 00 (PS00).
  8. If you want to know what is happening with the second power stage press the Esc key (3rd button from left)
  9. This should take you back to the previous screen, press the 2nd button from the left to select PS01, power stage 1.
  10. Repeat from step 5 for information on PS01

The STATE code that you retrieve from navigating through the STATE PS menu in SETUP tells us why the STATE 516 warning message has been showing.

It is usually an internal fault which will need to be repaired by a Fronius service partner such as Gold Coast Solar Power Solutions but to ensure that it isn’t just a one off error the best thing to do is try to reboot the inverter.

To reboot your Fronius inverter follow the system shutdown procedure which should be near your inverter or possibly in your switchboard. Normally the shutdown procedure will be as follows.

  • 1. Locate the Solar Supply Main Switch in your switchboard and switch it OFF
  • 2. Locate the PV ARRAY MAIN SWITCH / SOLAR DC ISOLATOR (usually right beside the inverter) and switch it OFF

The inverter will turn off after a few seconds, wait 30 seconds or so and turn the system back on by turning the switches you just turned off back ON; the order in which you turn them on isn’t important.The inverter will attempt to start up, if after a few minutes the system is back in operation well done!

If it’s still coming up with a STATE 516 error or another fault code then it looks like you are going to need professional help.

How to get a Fronius STATE 516 error fixed

Image may be NSFW.
Clik here to view.
Gold Coast Solar Power Solutions are a Fronius Service Partner
If your Fronius inverter is still within the warranty period or even if your not sure (a 5 year warranty is standard) then you can call Fronius directly on 03 8340 2910 or you can contact us here.

Before we can provide any advice we will require your inverters serial number which can be found underneath the inverter. It will be 8 digits followed by a / and 2 more digits, such as 12345678/20.

If your inverter is out of the warranty you have 2 options:

  • 1. Pay to get it fixed (and still have no warranty)
  • 2. Install a quality replacement inverter with a full new warranty.

Either way we can help, just contact us here or call Fronius on 03 8340 2910, the Fronius guys in Melbourne are a great help.

Click here for a full list of Fronius IG inverter STATE codes
View Fronius IG Inverter Manual Here

Got A Question About Solar Power? Click Here For Answers!

The post Fronius inverter STATE 516 fault code appeared first on Gold Coast Solar Power Solutions.


Installing Solar Panels on a Flat Roof

Solar panels of a flat roof – the Pros and Cons

Installing solar panels on the Gold Coast flat to a very low pitch or flat roof is not usually recommended as when solar panels are installed this way the self cleaning capability of the solar panels is diminished. What tends to happen is the dirt that builds up on the solar panels is not effectively washed off by the rain, so the system may not function quite as efficiently and will possibly require additional cleaning.

Image may be NSFW.
Clik here to view.
Solar Panels installed directly to a flat roof at Nerang on the Gold Coast

The self cleaning aspect is certainly a detrimental point about installing solar panels flat to a flat or low pitched roof, however the only other option is to install the solar panels on tilt framing to achieve the desired tilt and the benefits this provides (higher power output and self cleaning). Tilt framing certainly has its benefits however there are drawbacks which need to be considered as follows:

  • Solar panels installed on tilt framing put a much higher wind loading on the solar panels and roof.
  • Solar panels installed on tilt framing shade the roof behind the panels. This means that a second row of solar panels cannot be installed close to the row in front as the front row will shade the back row, and shading is very detrimental to the performance of solar panels. This means that more space is required on the roof – if space is of the premium then this is a major issue.
  • Tilt framing is more expensive and time consuming to install than installing solar panels flat to a roof.

Solar Power Production On Flat Roof

Image may be NSFW.
Clik here to view.
Solar power installed on flat roof compared to tilt
An important point to take into consideration when installing solar panels on a flat roof is the performance of the solar panels either installed on tilt or installed flat. Over the entire year the difference in solar production from a system installed at a pitch between 22 and 30o is around 10% higher than a system installed directly to a flat roof. A point to keep in mind here is that this 10% difference in power is not evenly spread over the year as can be seen on the chart to the right.

This chart shows that a 5 kW solar power system installed flat to a roof in the middle of winter produces around 3 kWh less power per day than the tilted comparison, but in the summer months it actually produces slightly more power than the tilted system!

On the Gold Coast and Queensland in general this is good to know as one of the main loads that solar power is used to offset is air conditioning, which always tends to be working that much harder over the summer months, so system installed flat to the roof would work very well to cover this type of summer load.

At the end of the day a 10% difference in power production is not a massive difference, especially when roof space is at a premium. When installing solar panels on tilt framing you can only install around half the solar panels you could if the system was installed flat due to the additional space required to ensure the rows of solar panels don’t throw shade on the solar panels behind. If you are wanting to maximise the amount of power produced by a system being able to nearly double the number of solar panels for an efficiency loss of around 10% makes good sense.

Flat Roof Installations of Solar Panels – What’s Best?

The best option for you really depends on your unique situation. As discussed the following points are the main things that need to be considered:

  • Is roof space at a premium and you want to get as much power as possible out of the available space? Solar panels installed flat to the roof may be the best option.
  • What time of year is the solar power most required? If it’s over the winter months then a tilted solar panel is going to produce a lot more power in winter than a solar panel installed flat. If it’s in the summer months for air conditioners and cooling loads then solar panels installed flat will work great, solar panels installed flat are at the best angle to provide maximum returns over the summer months (for the Gold Coast & Queensland anyway).
  • Do you have a large amount of roof space and there’s plenty of room for your solar panels to be installed on tilt? Tilt may be the best option for you.
  • Are you after the fastest ROI (Return On Investment) possible? Installing solar panels flat to the flat roof will provide the fastest ROI as the installation and material costs are much cheaper than a tilted system.
  • After the highest returns in the long term and you have the available roof space? A solar power system installed on tilt framing will be the best option as a system tilted to the north at a pitch between 22 and 30o will produce around 10% more power than a system installed directly to a flat roof.

So at the end of the day the correct answer all depends on your unique requirements. if you are anywhere near the Gold Coast we can certainly assist you; feel free to contact us here for expert advice from the Gold Coast’s solar power experts – Gold Coast Solar Power Solutions.

Image may be NSFW.
Clik here to view.
If you live on the Gold Coast click here for your FREE home solar power site inspection & quotation from Gold Coast Solar Power Solutions

Got A Question About Solar Power? Click Here For Answers!

The post Installing Solar Panels on a Flat Roof appeared first on Gold Coast Solar Power Solutions.

Solar Immersion – Maximise your solar power self consumption

Maximise the self consumption of your solar power with Solar Immersion

Image may be NSFW.
Clik here to view.
Solar Immersion Device helps you maximise your self consumption of solar power
With the price that electricity retailers pay you for surplus solar power these days being between 4c to 10c per kWh and the price we pay for power being around 27c a kWh it just does not make sense to send surplus power back to the grid if you can possibly help it. The problem we have is a typical home has a daily power consumption and solar production graph that looks something like the below.

Typical Power Consumption & Solar Production Graph – Note lots of Surplus Solar Power!

Image may be NSFW.
Clik here to view.
Low solar self consumption graph

With the above graph you can see the following:
Red shaded area representing power which has been taken from the grid at a cost of 27c a kWh.
Blue area is self consumed solar power which is what we want, that is saving us from taking power from the street at 27c a kWh.
Green is surplus solar power; this is solar power which has been generated but hasn’t been used so it has been sent back to the street as surplus solar power at 4c to 10c a kWh, depending on rates paid by your electricity retailer.

With this system we actually put a timer on the hot water system with a 1.8kW element to try and maximise solar self consumption; that’s the big spike in power you can see at around 10am. On this particular day the plan backfired quite badly as 10am happened to be right when a cloud came over and caused a big drop in solar power production, causing most of the hot water to be heated from the grid at 27c a kWh – exactly what we were trying to avoid.

To really maximise the self consumption of solar power we really want something that monitors exactly how much surplus solar power there is and then puts that amount of power to use, and that is exactly what the Solar Immersion device does.

How Solar Immersion helps you use your surplus solar power

Image may be NSFW.
Clik here to view.
Solar Immersion Device helps you maximise your self consumption of solar power
The Solar Immersion device connects to your hot water system as well as the mains cables coming in from the street. It monitors the power coming from the grid as you consume power and it also monitors any power going back to the grid as surplus when your solar power system is producing more power than you’re using. What it will do is see exactly how much surplus solar power you have available and it will send exactly that amount of power to your hot water system.

Effectively what the system is doing is using your hot water cylinder as a solar power storage device, a bit like a battery. It stores your surplus solar power effectively as hot water and then you can draw from it at a later time as required.

Solar Immersion Power Consumption & Solar Production Graph – Note Solar Power Self Consumption!

Image may be NSFW.
Clik here to view.
solar immersion maximises solar power self consumption

In the above graph you can see the same solar power system as previously shown but this time with the Solar Immersion device fitted. The thing that’s immediately obvious is just how much more solar power self consumption has been achieved!Image may be NSFW.
Clik here to view.
Click here for a Solar Immersion quotation
You can see how the Solar Immersion device has sent all the surplus solar power to the hot water system until about 2pm; by that time the water was up to temperature and the thermostat turned the system off, with the remaining surplus solar power being sent back to the grid as surplus.

Solar Immersion – a great way to maximise your self consumption of solar power

As can be seen the Solar Immersion device provides a great way to maximise your solar power self consumption and works out to be much cheaper then even a very small battery bank when it comes to storing surplus solar power, but how much surplus solar power can you actually store in your hot water system? That will depend on 2 factors – the size of your hot water system and the temperature that the water needs to be heated too.

Power required to heat hot water cylinders of various sizes by 40oC

Tank Capacity (Litres)
Power Required (kWh)
100 4.67
150 7.00
Capacity of Tesla PowerWall Battery 7.00
200 9.33
250 11.67
300 14.00
350 16.33
400 18.67

Image may be NSFW.
Clik here to view.
Click here for a Solar Immersion quotation
As can be seen from this table a standard home hot water system can easily store more surplus solar power than a battery bank such as the Tesla PowerWall and at a fraction of the cost! Why not contact Gold Coast Solar Power Solutions to see if a Solar Immersion device is right for you today?

Got A Question About Solar Power? Click Here For Answers!

The post Solar Immersion – Maximise your solar power self consumption appeared first on Gold Coast Solar Power Solutions.

Store surplus solar power in your hot water system

What do electric hot water systems and storage batteries have in common?

The answer is they both take electricity and store it so it can be consumed later. No the hot water system doesn’t give you electricity back, it transfers the electricity into the water in the form of heat for later use.
Image may be NSFW.
Clik here to view.
Store your surplus solar power in your hot water system with Solar Immersion
With the rate electricity companies pay you for surplus solar power being very low it just doesn’t make sense to send your surplus solar power back to the grid. What you want to do is store surplus solar power so you can draw on it later when you need it, but the problem is batteries are still very expensive.

Solar power battery storage systems such as the Tesla PowerWall are designed to monitor both your power consumption and solar production, and when the system sees surplus solar power it directs that to the battery so you can then draw from it later. What if you could store this surplus solar power in a storage tank you probably already have – an electric hot water cylinder?

Store surplus solar power in your hot water system

Your hot water system is not a battery however it can be setup with a device called “Solar Immersion” to take your surplus solar power and store it in the form of hot water for you to use later as required. This is the same principle that solar power battery storage systems such as the Tesla PowerWall use however it’s available at a fraction of the cost of a solar power battery storage system.

This “Solar Immersion” system achieves the same thing as a solar power battery storage system in maximising your solar power self consumption. No it doesn’t give you power to use after dark and it won’t give you power for your fridge in a black out but it will effectively store surplus solar power in a form that can be used after dark, and at a much lower price point compared to any battery storage system it makes a whole lot of sense until batteries become more affordable.
Image may be NSFW.
Clik here to view.
Find out more about Solar Immersion and store surplus solar power here.

The post Store surplus solar power in your hot water system appeared first on Gold Coast Solar Power Solutions.

Quality Solar Inverters Delivered to Your Door

Image may be NSFW.
Clik here to view.
Get you solar inverter working again ASAP with Gold Coast Solar Power Solutions

[contact-form-7]Not anywhere near the Gold Coast or Brisbane area? No worries! We can’t personally install your inverter for you but we can send a quality replacement inverter with FREE delivery straight to your door.

Why purchase an inverter from us?

  • Quality solar inverters in stock ready for delivery ASAP
  • Expertise to recommend the right inverter to suit your system
  • FREE delivery Australia wide!
  • Have your replacement inverter on site ASAP ready for installation
  • Deal with a company that has been supplying quality solar power products since 2008

Who should install my new inverter?

Any electrical work performed in Australia must be carried out by a licensed electrician and replacing your solar inverter is electrical work. As replacing a solar inverter does involve dealing with dangerous solar DC voltage we highly recommend that your new inverter be installed by an electrician who is also a CEC accredited solar installer.

Click here to find a local CEC accredited solar installer to install your new solar inverter.

What about warranties?

Your new inverter will be covered by the manufacturer warranty which begins on the date of installation. Make sure that you receive a dated invoice from your installer and keep this on record in case a warranty claim is ever required.

What inverter is best for my system?

The replacement solar inverter that we recommend to you will depend on a number of factors mainly based on information we can gather from the type of inverter you currently have installed. You can look at installing a larger inverter but please be aware that doing so may void your solar feed in tariff and will require prior approval by your local power company. It’s certainly much easier to just replace the faulty inverter with a “like for like” replacement model of the same power capacity and topology to avoid any potential issues.

For more information on the quality solar inverters we recommend please check out the following: Quality solar inverters recommended by Gold Coast Solar Power Solutions.

To organise an appropriate replacement solar inverter delivered FREE to your door please call us on 07 55 228 980 of fill out the form on this page, we will be in touch ASAP.

Image may be NSFW.
Clik here to view.
Quality solar power inverters recommended by Gold Coast Solar Power Solutions

The post Quality Solar Inverters Delivered to Your Door appeared first on Gold Coast Solar Power Solutions.

Fronius STATE 304 Fault Code

STATE 304 Code on a Fronius IG Inverter? We Can Help. 

Image may be NSFW.
Clik here to view.
Need a quality solar inverter? We deliver Australia wide

[contact-form-7]Image may be NSFW.
Clik here to view.
Fronius STATE 304 fault code on your solar inverter? Get help with Gold Coast Solar Power Solutions

As a Fronius service partner we’ve seen a number of Fronius IG series inverters with STATE 304 errors. Fronius describe this issue as “Heat sink temperature on the DC-DC board too high”, or in simple terms the inverter is over heating. Fronius list the following as possible causes:

  1. Ventilation slot congested
  2. Exalted ambient temperature
  3. Distance between the inverters too small (if multiple inverters are present)
  4. Fan cable not connected
  5. DC-DC board faulty

In our experience at Gold Coast Solar Power Solutions as a Fronius Service Partner we have found that the usual cause of the STATE 304 error is not any of the above but rather it usually ends up being a failure of the internal 12V fan inside the inverter. The fans seem to start failing when the inverter is about 6 or 7 years old, and when the fan fails obviously it can no longer control the inverters internal temperature.

What the inverter will usually do with this STATE 304 code is work away happily until the temperature rises too high and then it will drop out and show the STATE 304 error. When the temperature in the inverter has dropped back down to a safe level the inverter will start back up, overheat again, and drop out again.

Unfortunately when the fan tends to fail in the Fronius IG inverters it usually damages the DC-DC board inside the inverter as well, so both components usually end up needing to be replaced. If it was just the fan then it would be a relatively inexpensive repair, however when it’s both the fan and the DC-DC board it’s not the same story..

How to get a Fronius STATE 304 error fixed

Image may be NSFW.
Clik here to view.
Gold Coast Solar Power Solutions are a Fronius Service Partner
If your Fronius inverter is still within the warranty period or even if your not sure (a 5 year warranty is standard) then you can call Fronius directly on 03 8340 2910 or if your near the Gold Coast or Brisbane you can contact us here.

Before we can provide any advice we will require your inverters serial number which can be found underneath the inverter. It will be 8 digits followed by a / and 2 more digits, such as 12345678/20.

If your inverter is out of the warranty you have 2 options:

  • 1. Pay to get it fixed (and still have no warranty)
  • 2. Install a quality replacement inverter with a full new warranty.

Either way we can help, if you’re near the Gold Coast or Brisbane contact us here, if you’re not near the Gold Coast or Brisbane area we can send you a quality replacement inverter, just click on the image below for more details.

Image may be NSFW.
Clik here to view.
Need a quality solar inverter? We deliver Australia wide

Click here for a full list of Fronius IG inverter STATE codes
View Fronius IG Inverter Manual Here

Click here to get your solar power system back saving you money rather than costing you money!

Got A Question About Solar Power? Click Here For Answers!


The post Fronius STATE 304 Fault Code appeared first on Gold Coast Solar Power Solutions.

Fronius IG inverter under performing

Is your Fronius IG Inverter under performing?

Image may be NSFW.
Clik here to view.
Need a quality solar inverter? We deliver Australia wide

[contact-form-7]Image may be NSFW.
Clik here to view.
IS your Fronius inverter only producing a low amount of power?

As a Fronius service partner on a number of occasions we’ve seen Fronius IG inverters that are not producing as much power as they should be, but no error codes are shown on the display. Unfortunately as no error message is being displayed people often don’t realise they have a problem with the system.

The first thing to check if your system is under performing is that there is no shading on the solar panels, as if there is any shading present on any of the solar panels it will be very detrimental to the performance of your solar power system. If you have checked the panels and you definitely don’t have a problem with shading then it may be an issue with your Fronius inverter.

Can you hear the inverter fan running?

The easiest way to check if the under performance of your solar power system is due to a problem with your inverter is to put your ear to the inverter in the middle of a sunny day and listen – you should be able to hear the quiet whir of the inverter’s internal fan. If over a period of time you can’t hear any noise from the fan it may well be that the fan has failed and is causing the under performance of the system.

Usually if the fan inside a Fronius inverter fails it will come up with an over heating fault code such as a STATE 303 or STATE 304 error code, but we’ve found that sometimes for one reason or another the fan fails and instead of shutting the inverter down and displaying an error code it just derates the power production of the system. This keeps the inverter operating but it will be performing well below the optimal level that it should be. The power production is derated so the inverter doesn’t get too hot and cause further damage to the system.

The internal fan inside the Fronius IG inverter is a 12V fan, very similar to what you will find in a desktop computer. The fans seem to start failing when the inverter is about 6 or 7 years old, and when the fan fails obviously it can no longer control the inverter’s internal temperature.

Unfortunately when the fan tends to fail in the Fronius IG inverters it usually damages the DC-DC board inside the inverter as well, so both components usually end up needing to be replaced. If it was just the fan then it would be a relatively inexpensive repair, however when it’s both the fan and the DC-DC board it’s not the same story..

How to get a Fronius IG Inverter under performance issue fixed

Image may be NSFW.
Clik here to view.
Gold Coast Solar Power Solutions are a Fronius Service Partner
If your Fronius inverter is still within the warranty period or even if you’re not sure (a 5 year warranty is standard) then you can call Fronius directly on 03 8340 2910 or if you’re near the Gold Coast or Brisbane you can contact us here.

Before we can provide any advice we will require your inverter’s serial number which can be found underneath the inverter. It will be 8 digits followed by a / and 2 more digits, such as 12345678/20.

If your inverter is out of the warranty you have 2 options:

  • 1. Pay to get it fixed (and still have no warranty)
  • 2. Install a quality replacement inverter with a full new warranty.

Either way we can help, if you’re near the Gold Coast or Brisbane contact us here, if you’re not near the Gold Coast or Brisbane area we can send you a quality replacement inverter; just click on the image below for more details.

Image may be NSFW.
Clik here to view.
Need a quality solar inverter? We deliver Australia wide

Click here for a full list of Fronius IG inverter STATE codes
View Fronius IG Inverter Manual Here

Click here to get your solar power system back saving you money rather than costing you money!

Got A Question About Solar Power? Click Here For Answers!


The post Fronius IG inverter under performing appeared first on Gold Coast Solar Power Solutions.

Belgian Delights 32.5kW Commercial Solar Power System

Image may be NSFW.
Clik here to view.
Belgian Delights solar power system proudly designed and installed by Gold Coast Solar Power Solutions
Belgian Delights is both a wholesaler and retailer of authentic Belgian style couverture chocolates. Over the years as business has grown so too have the running costs with the power bills in particular rising dramatically at their chocolate factory located at Molendinar on the Gold Coast.

In an effort to minimise these business overheads Gold Coast Solar Power Solutions was approached to investigate the viability of a solar power system for the Molendinar chocolate factory.

After inspecting the facility, monitoring the sites power consumption and assessing the businesses power consumption history Gold Coast Solar Power Solutions designed a 32.5kW solar power system as an efficient solution to lower the sites large power bills. The solar proposal was presented to the management team and with the systems estimated Return on Investment (RoI) of just 3.5 years using quality equipment complete with long warranties the decision was made to approve the installation.

Gold Coast Solar Power Solutions supplied and installed 130 x DAQO New Energy 250W solar panels for Belgian Delights connected to 2 x Solar Edge 15kW inverters. Utilising the SolarEdge module level power optimisation and monitoring technology allows both Belgian Delights and Gold Coast Solar Power Solutions to keep a close eye on the performance of the entire system and ensure the very highest yield is achieved from each solar panel installed.

View current production information on the Belgian Delights solar power system here.

Since installation Belgian Delights have been delighted with the savings the system has achieved as the savings have proven to be even better than originally estimated.

Image may be NSFW.
Clik here to view.
Belgian Delights roof, solar panels installed by Gold Coast Solar Power Solutions.
Image may be NSFW.
Clik here to view.
A typical summers day of power consumption and solar production at Belgian Delights

Company Belgian Delights
Company Website www.belgiandelights.com.au
Location Molendinar, Gold Coast Australia
Installation Date December 2014
Industry Manufacturing
Solution 130 x DAQO New Energy 250 W Solar Panels
2 x SolarEdge 15 kW Inverters
65 x SolarEdge 500 W Power Optimisers
1 x SolarEdge Communications Gateway
Estimated Savings over 25 years $300,000.00
CO2 Equivalent Abatement per year 43 Tonnes
Energy Output per year 52,500 kWh

Image may be NSFW.
Clik here to view.
Click here for a FREE, no obligation quotation for home solar power from your Gold Coast solar power experts.

The post Belgian Delights 32.5kW Commercial Solar Power System appeared first on Gold Coast Solar Power Solutions.


Tamborine Mountain Bowls Club 21 kW Commercial Solar System

Nestled up on the top of Mount Tamborine is the Tamborine Mountain Bowls Club. As an organisation catering for the local bowling community it’s a continual juggling act of trying to keep prices for patrons as affordable as possible whilst ensuring the running costs of the club are covered. With the continual rise in power costs over the last few years the decision was made to investigate the viability of a solar power system for the club in the hope that it would make a significant dent in the clubs power bills.

Image may be NSFW.
Clik here to view.
Tamborine Mountain Bowls Club Solar Power Production bell curve
Gold Coast Solar Power Solutions was asked to provide a solution to suit the clubs requirements and after inspecting the facility and assessing the clubs power consumption history a 21kW solar power system was designed to suit the sites day time power consumption. At the request of Energex this system was also designed to be a “zero export” system; Energex would not allow any surplus solar power to be sent back to the power grid.

The solar proposal utilising quality equipment complete with long warranties was presented to the management team and with the systems estimated Return on Investment (RoI) of just 3.1 years and estimated power bill savings to an amount greater than $200,000 over the next 25 years the decision was made by the board to move forward with the installation.

Gold Coast Solar Power Solutions supplied and installed 84 x DAQO New Energy 250W solar panels on the Tamborine Bowls Club connected to a Solar Edge 17 kW 3 phase inverter. Utilising the SolarEdge module level power optimisation and monitoring technology allows both the Bowls Club management and Gold Coast Solar Power Solutions to keep a close eye on the performance of the entire system and ensure the very highest yield is achieved from each solar panel installed.

View current production information on the Tamborine Mountain Bowls Club solar power system here.

Since installation the Tamborine Mountain Bowls Club have seen their power bills cut by over 40% with the system proving to yield even higher than originally anticipated.

Image may be NSFW.
Clik here to view.
Tamborine Mountain Bowls Club Solar Panels on Roof

Company / Organisation Tamborine Mountain Bowls Club
Location Tamborine Mountain, Gold Coast Australia
Installation Date July 2015
Industry Club / Entertainment
Solution 84 x DAQO New Energy 250 W Solar Panels
1 x SolarEdge 17 kW 3 phase Inverter
84 x SolarEdge 300 W Power Optimisers
1 x SolarEdge Electricity Meter
Estimated Savings Over 25 Years Over $200,000.00
CO2 Equivalent Abatement per year 26.9 Tonnes
Energy Output per year 32,856 kWh

Image may be NSFW.
Clik here to view.
Click here for a FREE, no obligation quotation for home solar power from your Gold Coast solar power experts.

Image may be NSFW.
Clik here to view.
Tambrone Mountain Bowls Club 21kW of Solar Panels

The post Tamborine Mountain Bowls Club 21 kW Commercial Solar System appeared first on Gold Coast Solar Power Solutions.

Gullivers Coomera 22.36kW Commercial Solar Power System

Image may be NSFW.
Clik here to view.
Gullivers swim school logo
Gullivers Coomera started out as a swimming centre and over time has grown into a multi-functional facility catering for all members of the family across a wide range of activities and services. As the facility has grown and expended over the years so too have the running costs with the power bills in particular rising dramatically over the last decade.

The owner of Gullivers Coomera had previously employed the services of Gold Coast Solar Power Solutions for the solar power system at their home and being impressed with the past service Gold Coast Solar Power Solutions were the logical first port of call when it came to solar power for the business.

Image may be NSFW.
Clik here to view.
Gullivers Coomera solar power bell curve
After inspecting the facility, monitoring the sites power consumption and assessing the businesses power consumption history Gold Coast Solar Power Solutions designed a 22.36 kW solar power system as an efficient solution to lower the sites large power bills. The solar proposal was presented to the management team and with the systems estimated Return on Investment (RoI) of just over 4 years using quality equipment complete with long warranties the decision was made to approve the installation.

Gold Coast Solar Power Solutions supplied and installed 86 x REC Peak Energy 260W solar panels for Gullivers Coomera connected to a Solar Edge 17 kW inverter. Utilising the SolarEdge module level power optimisation and monitoring technology allows the Gullivers Coomera management team and Gold Coast Solar Power Solutions to keep a close eye on the performance of the entire system and ensure the very highest yield is achieved from each solar panel installed.

View current production information on the Gullivers Coomera solar power system here.

Since installation Gullivers Coomera have enjoyed substantial savings on their power bills with savings over the 25 year system life span expected to be higher than $200,000.00

Image may be NSFW.
Clik here to view.
Gullivers Coomera roof, solar panels installed by Gold Coast Solar Power Solutions.
Image may be NSFW.
Clik here to view.
Gullivers Coomera Solar Panels North roof installed by Gold Coast Solar Power Solutions

Company Gullivers Coomera
Company Website www.gulliverscoomera.com.au
Location Upper Coomera, Gold Coast Australia
Installation Date October 2014
Industry Swim School / Multi Function Facility
Solution 86 x REC 260 W Peak Energy Solar Panels
1 x SolarEdge 17 kW Inverter
43 x SolarEdge 500 W Power Optimisers
1 x SolarEdge Electricity Meter
Estimated Savings over 25 years $207,000.00
CO2 Equivalent Abatement per year 26.7 Tonnes
Energy Output per year 32,500 kWh

Image may be NSFW.
Clik here to view.
Click here for a FREE, no obligation quotation for home solar power from your Gold Coast solar power experts.

Image may be NSFW.
Clik here to view.
Gullivers Coomera Solar Panels 2

The post Gullivers Coomera 22.36kW Commercial Solar Power System appeared first on Gold Coast Solar Power Solutions.

Electro Plating 99.84 kW Commercial Solar Power System

The electro-plating process is incredibly energy intensive and so a major expense involved with operating an electro-plating business is electricity.

The owners of a large electro-plating business in the Brisbane suburb of Brendale employed the services of Gold Coast Solar Power Solutions to install a solar power system to help lower their monthly power bills which were close to $7,000 per month.

Gold Coast Solar Power Solutions installed 384 x Jinko 260W Smart Module solar panels with embedded SolarEdge optimisers connected to 3 x Solar Edge 27.6 kW inverters. Utilising the SolarEdge module level power optimisation and monitoring technology allows the electro-plating management team and Gold Coast Solar Power Solutions to keep a close eye on the performance of the entire system and ensure the very highest yield is achieved from each solar panel installed.

With a system of this size identifying and locating an individual under performing solar panel among so many with a standard grid connect solar power system is very time consuming and therefore expensive. For this reason we highly recommend the SolarEdge product as we can pinpoint a fault in a moment of time, greatly reducing maintenance costs and ensuring each individual solar panel is performing at its optimum.

View current production information on the 99.84 kW electro-plating solar power system here.

This solar power system is providing the customer with substantial savings on their power bills with savings over the 25 year system life span expected to be higher than $350,000.00

Image may be NSFW.
Clik here to view.
100kW commercial solar power system installed by Gold Coast Solar power Solutions

Company Electro-plating business
Location Brendale, Brisbane Australia
Installation Date June 2016
Industry Manufacturing
Solution 384 x Jinko 260W Smart Modules (with embedded SolarEdge optimisers)
3 x SolarEdge 27.6 kW Inverters
1 x SolarEdge Communications Gateway
Estimated Savings over 25 years over $350,000.00
CO2 Equivalent Abatement per year 122 Tonnes
Energy Output per year 149,410 kWh

Image may be NSFW.
Clik here to view.
Click here for a FREE, no obligation quotation for home solar power from your Gold Coast solar power experts.

Image may be NSFW.
Clik here to view.
100kW of solar panels installed by Gold Coast Solar Power Solutions
Image may be NSFW.
Clik here to view.
3 x SolarEdge 27.6kW inverters installed by Gold Coast Solar Power Solutions

The post Electro Plating 99.84 kW Commercial Solar Power System appeared first on Gold Coast Solar Power Solutions.

Rochedale Christian Children’s Centre 20kW Commercial Solar

Image may be NSFW.
Clik here to view.
Rochedale Christian Children's Centre Commercial Solar installed by Gold Coast Solar Power Solutions
Childcare centre’s provide a safe and comfortable environment for children, and part of that comfortable environment involves conditioning the air temperature. Air conditioning is a major component of a childcare centre’s power consumption and the Rochedale Christian Children’s Centre was no exception.

Gold Coast Solar Power Solutions were approached by the owner of the Rochedale Christian Children’s Centre to supply a solar power solution that would best suit their power requirements. After examining the businesses power bills and available roof space a 20kW solar power proposal was put forward and with the short payback period the system would provide and the quality products on offer Gold Coast Solar Power Solutions were selected for the project.

Gold Coast Solar Power Solutions installed 80 x 250W solar panels connected to a Fronius SYMO 17.5 kW inverter at the Rochedale Children’s Centre in February 2016.

This solar power system is providing the customer with substantial savings on their power bills. Savings over the 25 year system life span are expected to be higher than $187,000.00

Image may be NSFW.
Clik here to view.
Rochedale Christian Childrens Centre Solar Panels

Company Rochedale Christian Children’s Centre
Website www.christianchildcare.com.au
Location Rochedale, Brisbane Australia
Installation Date February 2016
Industry Childcare
Solution 80 x 250W solar panels)
1 x Fronius 17.5 kW Inverter
Estimated Savings over 25 years over $187,000.00
CO2 Equivalent Abatement per year 25 Tonnes
Energy Output per year 29,930 kWh

Image may be NSFW.
Clik here to view.
Click here for a FREE, no obligation quotation for home solar power from your Gold Coast solar power experts.

The post Rochedale Christian Children’s Centre 20kW Commercial Solar appeared first on Gold Coast Solar Power Solutions.

Clenergy SPH Solar Inverter Error Messages

Image may be NSFW.
Clik here to view.
Clenergy solar power inverter manual and datasheet
To make it easier to determine actions to take on common Clenergy SPH Solar Inverter Error Messages, Gold Coast Solar Power Solutions have put together a list of fault displays, explanations and resolutions. If you encounter any of these errors on your Clenergy SPH inverter please note that those shown in bold letters are to be carried out by a qualified electrician.

View the Clenergy SPH solar inverter user manual here.

Fault

Display

Possible Actions

System No Utility 1.No grid voltage. Check the grid voltage by multi-meter.
2.Check grid connection, such as wire and connector to the inverter.
3.Check breaker between inverter and grid; if it is tripped, DO NOT CLOSE again, get an electrician to check the wiring and inverter.
Grid Fault 1.Wait for grid power to return to normal. If the grid returns to normal, the inverter will start again automatically within 5 minutes.
2.Check the grid voltage and frequency by multi-meter. Make sure grid voltage and frequency meet the specifications.
3.Contact your inverter service representative to discuss adjusting the operating range, if permitted by the electricity provider.
Impedance Fault 1.The grid impedance is higher than the permissible value.
2.Wait for grid power to return to normal. If the grid returns to normal, inverter will start again automatically within 5 minutes.
3. Check the wires between inverter and grid. For high impedance connections, get an electrician to increase the wire size.
4. Contact your inverter service representative to discuss adjusting the operating range, if permitted by the electricity provider.
Isolation Fault 1.Check the impedance between PV (+) & PV (-) and earth ground. The impedance must be larger than 8M . If the impedance is low a ground fault may exist in the PV array or wiring. Contact your PV array service provider or electrician.
2.If above actions do not fix the problem, the isolation detection circuit may be faulty. Contact your inverter service representative.
Ground I Fault 1.This is caused by too high ground current.
2.Disconnect the inverter from the grid power. Check the AC wiring and connection system.
3.After the cause is cleared, reconnect the grid power. Check the status of the inverter.
4.If above actions do not fix the problem, the GFCI circuit may be faulty. Contact your inverter service representative.
Inverter Failure Over Temperature 1.The internal temperature is higher than specified normal value.
2.Reduce the ambient temperature by shading or ventilation improvements or move inverter to cooler place.
3.If this is not effective, a temperature sensor may be faulty. Contact your inverter service representative.
PV Over Voltage 1. Check the PV open-circuit voltage. This should be less than 500VDC.
2.  If the PV voltage is much less than 500VDC (e.g. <430V), measure the DCV by multi-meter, compare the readings on meter and LCD.
If the readings differ by >5%, contact your inverter service representative.
Device Fault 1.This is caused by an inverter malfunction.
2.Disconnect PV (+) or PV (-) from the input, start the unit again.
3.If it does not work, contact your inverter service representative.
Consistent or Mismatch Fault 1.This is caused by inconsistent values between the main (master) and redundant (slave) controllers of the inverter.
2.Disconnect PV (+) or PV (-) from the input, start the unit again.
3.If this does not work, contact your inverter service representative.

Here are some more Clenergy SPH Solar Inverter Error Messages and explanations that you may see on its screen.

Error Message  Explanation
No Utility  Grid voltage is not detected
PV Over Voltage  PV voltage is too high
DC Bus High  Internal DC bus voltage is too high
DC Bus Low  Internal DC bus voltage is too low
Over Temperature  Internal temperature is too high
Grid Fault  Grid voltage or frequency is out of range
Device Fault  Internal fault with inverter circuits
Isolation Fault  PV panel ground isolation problem
Impedance Fault  Grid impedance fault (or grid disconnected)
Ground I Fault  Grid output ground leakage current too high
Relay Failure  Grid output relay failure
DC INJ High  Grid DC injection too high
Ref 2.5V Fault  2.5V reference voltage internal circuit fault
DC Sensor Fault  Grid DC current sensor internal fault
GFCI Fault  Ground Fault Current Interrupt fault
Sci Fault  Internal Master/Slave communication fault
Consistent Fault  Internal Master/Slave value mismatch fault
CPU Ver Mismatch  Internal Master/Slave firmware incompatible
EEPROM Fault  Internal non-volatile memory fault
Grid V Mismatch  Internal Master/Slave grid voltage mismatch
Grid F Mismatch  Internal Master/Slave grid frequency mismatch
Grid Z Mismatch  Internal Master/Slave grid impedance mismatch
GFCI Mismatch  Internal Master/Slave ground fault value mismatch
DC Curr Mismatch  Internal Master/Slave grid DC current mismatch

Image may be NSFW.
Clik here to view.
Clenergy SPH Solar Inverter Error Messages
If you want to find out more of these Clenergy SPH Solar Inverter Error Messages, the full details are in the Clenergy manual’s Troubleshooting section. In case the resolution procedure does not fix the issue, contact your equipment installer or supplier for assistance if Clenergy SPH inverter is still within the 5-year warranty period. If your inverter is outside the warranty period we recommend that you get the assistance of professional solar power experts. If you’re in the Gold Coast or Brisbane area contact Gold Coast Power Solutions here and we will be in touch to provide you with further assistance.

View the Clenergy SPH solar inverter user manual here.

Image may be NSFW.
Clik here to view.
Need a quality solar inverter? We deliver Australia wide

Got A Question About Solar Power? Click Here For Answers!

The post Clenergy SPH Solar Inverter Error Messages appeared first on Gold Coast Solar Power Solutions.

Viewing all 154 articles
Browse latest View live