Quantcast
Channel: Solar power – Gold Coast Solar Power Solutions
Viewing all 154 articles
Browse latest View live

Sunny Roo and Sunna Inverter AL-14 Error

$
0
0

Does your Sunny Roo or Sunna solar inverter have the orange light on and an AL-14 error message on the screen?

Sunny Roo and Sunna inverter AL-14 error code
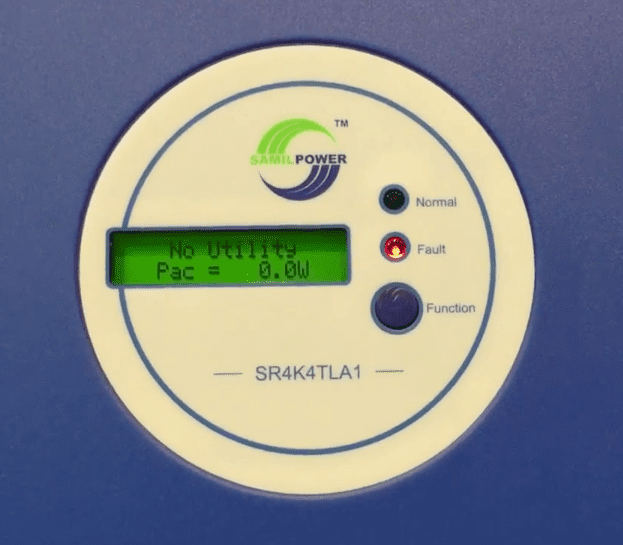
At Gold Coast Solar Power Solutions we’ve seen a large number of Sunny Roo and Sunna inverters displaying the AL-14 fault message. According to the Sunny Roo and Sunna solar inverter manuals the AL-14 fault message means that “the waveform of utility is fail”. Now isn’t that helpful to know?! What it means in plain English is the Sunny Roo or Sunna inverter has detected an issue with the AC power feeding into the inverter from your switchboard; now this could be the case or it could be a failure inside the inverter – from our experience unfortunately it tends to be the latter..

What can you do about a Sunny Roo or Sunna Inverter AL-14 Fault?


The first thing you can try is rebooting your solar power system:

  1. Turn OFF the Solar Supply Main Switch in the switchboard
  2. Turn OFF the PV Array DC Isolator beside the inverter
  3. Wait for the Sunny Roo or Sunna inverter screen to go blank and then a few more seconds
  4. Turn the PV Array DC Isolator beside the inverter back ON
  5. Turn the Solar Supply Main Switch in the switchboard back ON
  6. Wait for the inverter to reboot
  7. See if the AL-14 fault has cleared

If the reboot has not cleared the AL-14 fault then it looks like you will require the assistance of a professional solar power accredited electrician. If you are on the Gold Coast or the South side of Brisbane then contact us here, otherwise contact your local solar power professional for further assistance.

Click here to get your solar power system back saving you money rather than costing you money!

Got A Question About Solar Power? Click Here For Answers!

The post Sunny Roo and Sunna Inverter AL-14 Error appeared first on Gold Coast Solar Power Solutions.


ABB / Power One Inverter Int. Error E031

$
0
0

Is your ABB or Power One Aurora solar inverter displaying Int. Error E031? Gold Coast Solar Power Solutions can help!Have you just walked past your ABB or Power One solar inverter and been greeted with a Int. Error E031 fault on the screen?

According to the ABB / Power One Aurora operators manual Int. Error E031 indicates a wrong voltage measure or a voltage misreading by the inverter; so the inverter has an issue where it isn’t measuring voltage correctly. Unfortunately this is an internal error which will require the inverter to be replaced.

Int. Error E031 Fault – Covered by ABB / Power One Aurora Warranty

Thankfully if your ABB or Power One inverter is showing the Int. Error E031 it will be covered under warranty by the manufacturer if the inverter is still within the warranty period. ABB / Power One solar inverters have a standard warranty of 5 years.

ABB / Power One Aurora Inverter Int. Error E031 Fault – What To Do

If your ABB / Power One Aurora inverter was installed within the last 5 years then the best thing to do is get in touch with a local solar power company that specialise in after sales service such as Gold Coast Solar Power Solutions – where local if you’re on the Gold Coast or South Brisbane, if you are somewhere else you will need to look up a local company. We can make the warranty claim on your behalf with ABB and get a replacement solar inverter operational for you ASAP.

If your ABB / Power One Aurora inverter with the Int. Error E031 is out of the 5 year warranty the best thing to do would be to replace the faulty unit with a good quality replacement inverter. We recommend the Fronius solar power inverters as a nearly bulletproof replacement unit with a long 10 year parts warranty that is a perfect replacement for the ABB / Power Aurora inverters.

Click here to get your solar power system back saving you money rather than costing you money!

Got a Int. Error E031 error on your ABB / Power One Aurora inverter? Click here to learn about the quality replacement inverters we recommend.

Got A Question About Solar Power? Click Here For Answers!

The post ABB / Power One Inverter Int. Error E031 appeared first on Gold Coast Solar Power Solutions.

Earthing Solar Panels With Transformerless Inverters

$
0
0

If you are replacing your older solar power inverter with a new inverter a common issue that makes the changeover a little less straight forward is that most of the newer solar power inverters available are “transformerless” inverters. Transformerless inverters are very efficient inverters however they can lead to an issue with solar panels and solar panel mounting systems on older solar power systems that haven’t been earthed to the latest Australian Standards.

Electric Shocks From Solar Panels With Transformerless Inverters

Most older solar power inverters such as SMA’s (not TL models), Fronius IG series, AeroSharp, Latronics, Sharp, CMS and SEA Orion inverters among others were transformer inverters whereas a lot of the new solar inverters have a different design or topology; they are transformerless inverters.

Transformerless inverters require the solar panels on the roof and the framing system they are installed on to be earthed. This is due to the fact that tranformerless inverters can allow some AC voltage to the DC side (the solar panel side) with respect to ground and so if the solar panels and the solar panel mounting system is not earthed they could give an electric shock if touched. This type of an electric shock wouldn’t kill someone but could certainly startle you – and up on a roof is not a good place to get startled! Being startled by an electric shock on a roof could make someone fall off the roof – not good!

How to Avoid Electric Shocks With Transformerless Inverters – Earthing


To remove the risk of electric shocks from solar panels connected to transformerless inverters the solar panels and solar mounting system needs to be earthed, so if you are getting your inverter replaced with a transformerless inverter it is very important that your solar panels and solar panel mounting system is earthed, or the other option is to replace your inverter with a transformer model such as the Fronius Galvo series of inverter; however the Fronius Galvo are only available from 1.5kW, 2kW, 2.5kW and 3kW sizes.

Click here to get your solar power system back saving you money rather than costing you money!

Got A Question About Solar Power? Click Here For Answers!

The post Earthing Solar Panels With Transformerless Inverters appeared first on Gold Coast Solar Power Solutions.

ABB / Power One Aurora Riso Low Error

$
0
0

ABB / Power One Aurora Riso LowHave you just walked past your ABB or Power One Aurora solar inverter and been greeted with a Riso Low fault on the screen and a red GFI light?

According to the ABB / Power One Aurora operators manual Riso Low indicates the inverter has detected low insulation resistance on the DC side of your solar power system; this is usually not an issue with the inverter but with the DC circuit connected to the inverter. This could be an issue with the cabling, with the DC isolators or with the solar panels.

ABB / Power One Aurora Inverter Riso Low Fault – What To Do

If your ABB / Power One Aurora inverter is showing a Riso Low Fault as mentioned above it’s usually an insulation resistance fault on the DC side. This is an issue which is going to require the expertise of a local solar power expert – if you’re on the Gold Coast or South Brisbane contact us here, if you are somewhere else you will need to look up a local solar power company.

If you have 2 Solar DC Isolators at the Inverter try this

One thing you can try if you have 2 solar DC isolators beside your inverter is try turning off one of the isolators to isolate the fault. It is possible that the insulation resistance problem your inverter is seeing is just on 1 of the inputs into your inverter so you may be able to isolate the problem and get your solar power system working temporarily on half power. To try this do the following if your have 2 Solar DC Isolators beside your inverter:

    1. Turn the Solar Supply Main Switch OFF
    2. Turn both Solar DC Isolators OFF
    3. Wait for the inverter screen to go blank
    4. Turn 1 of the Solar DC Isolators back ON
    5. Turn the Solar Supply Main Switch back ON
    6. See if the inverter starts up without a fault.
    7. If the inverter starts up with the Riso Low fault again try repeating steps 1 to 6 but on step 4 turn ON the other Solar DC Isolator.
    8. If the inverter has started up without the Riso Low error then you have isolated the fault to the Solar DC input which is turned OFF, you still will require a solar power expert to get your solar power system fully operational again.

If you’re on the Gold Coast or South Brisbane we can get your solar power system back operational for you ASAP, contact us here!

Got A Question About Solar Power? Click Here For Answers!

The post ABB / Power One Aurora Riso Low Error appeared first on Gold Coast Solar Power Solutions.

KLNE Sunteams Solar Inverter Blank Screen

$
0
0

Is your KLNE Sunteams solar inverter screen totally blank?

KLNE Sunteams solar inverter blank screen
At Gold Coast Solar Power Solutions we’ve seen a large number of KLNE Sunteams inverters were the screen has gone completely blank. A blank screen on a KLNE Sunteams inverter could be caused by one of the following issues:

  1. An internal fault with the KLNE Sunteams inverter
  2. The screen has been damaged by the sun and is illegible
  3. A fault on the roof with the solar panels or wiring
  4. A fault with the DC isolator beside the inverter
  5. A fault with the DC connections into the inverter

Pretty much if you don’t have the green run light on on the inverter it is highly unlikely that your solar power system is working at all.

What can you do about a blank screen on your KLNE Sunteams Inverter?


The first thing you can try is rebooting your solar power system:

  1. Turn OFF the Solar Supply Main Switch in the switchboard
  2. Turn OFF the PV Array DC Isolator beside the inverter
  3. Wait for a few seconds
  4. Turn the PV Array DC Isolator beside the inverter back ON
  5. Turn the Solar Supply Main Switch in the switchboard back ON
  6. Wait for the inverter to reboot
  7. See if the screen displays any information

If the reboot has not fixed the blank screen problem then it looks like you will require the assistance of a professional solar power accredited electrician. If you are on the Gold Coast or the South side of Brisbane then contact us here, otherwise contact your local solar power professional for further assistance.

Click here to get your solar power system back saving you money rather than costing you money!

Got A Question About Solar Power? Click Here For Answers!

The post KLNE Sunteams Solar Inverter Blank Screen appeared first on Gold Coast Solar Power Solutions.

Clenergy GFCI Fault

$
0
0

Is your Clenergy solar inverter displaying a red light and a GFCI Fault message on the screen?

Clenergy GFCI Fault on Clenergy  Solar InverterAt Gold Coast Solar Power Solutions we’ve seen a large number of Clenergy inverters displaying the GFCI Fault message, it can be displayed on all the Clenergy inverter models although the SPH15, SPH20 amd SPH30 models are the main ones that seem to have the issue around the Gold Coast and Brisbane areas.

In each case according to the Clenergy solar inverter manual the GFCI Fault means Ground Fault Current Interrupt Fault. Now isn’t that helpful to know?! What it means in English is the Clenergy inverter has detected a fault whereby is detecting a ground fault with the system, and as this is a major issue it shuts the inverter down for safety. In our experience usually this is an internal fault with the inverter rather than an issue with any other part of the system but it will require a check by an accredited solar power installer.

What can you do about a Clenergy GFCI Fault?


The first thing you can try is rebooting the system:

  1. Turn OFF the Solar Supply Main Switch in the switchboard
  2. Turn OFF the PV Array DC Isolator beside the inverter
  3. Wait for the Clenergy inverter screen to go blank and then a few more seconds
  4. Turn the PV Array DC Isolator beside the inverter back ON
  5. Turn the Solar Supply Main Switch in the switchboard back ON
  6. Wait for the inverter to reboot
  7. See if the GFCI Fault has cleared

If the reboot has not cleared the GFCI Fault then it looks like you will require the assistance of a professional solar power accredited electrician. If you are on the Gold Coast or the South side of Brisbane then contact us here, otherwise contact your local solar power professional for further assistance.

Click here to get your solar power system back saving you money rather than costing you money!

Got A Question About Solar Power? Click Here For Answers!

The post Clenergy GFCI Fault appeared first on Gold Coast Solar Power Solutions.

Fronius Galvo Inverter STATE Codes

$
0
0

Gold Coast Solar Power Solutions are a Fronius Service PartnerGold Coast Solar Power Solutions are a Service Partner for Fronius solar power inverters, so if you’re on the Gold Coast and own a Fronius inverter and it develops a fault you can contact us here and we’ll get your solar power system back in action ASAP.

Gold Coast Solar Power Solutions carry spare parts for Fronius inverters in stock and are trained by Fronius to provide a quick and efficient warranty service, limiting any down time as much as possible. If your inverter is still under warranty the costs will be covered by Fronius.

If you are not on the Gold Coast please contact Fronius Tech Support on 03 8340 2910

View Fronius Galvo Manual Here

When a Fronius inverter has a fault it usually comes up with a STATE code to explain what’s wrong; the following table lists the Fronius Galvo series inverter STATE codes so you can get an idea on what your Fronius Galvo inverter is trying to tell you and what you can do about it.

Fronius Galvo Inverter STATE codes

Fronius STATE codes beginning with 1xx

Fronius STATE codes beginning with 1 usually only occur momentarily and are caused by the power from the street (the grid) being outside the inverters operating parameters. The Fronius inverter reacts by disconnecting from the grid and attempts to switch on again after the specified mains monitoring period, as long as no further errors occur during this period. The STATE code is displayed whilst the grid is being checked.

Code
Description
Behaviour
Remedy
STATE 102 AC voltage too high Following careful testing and when the grid conditions are within the permissible range again, the inverter will resume feeding energy into the grid. Check grid connections: If this STATE code keeps recurring contact your solar power system installer.
STATE 103 AC voltage too low
STATE 105 AC frequency too high
STATE 106 AC frequency too low
STATE 107 AC grid outside the permissible limits
STATE 108 Stand alone operation detected

Fronius STATE codes beginning with 3xx

Fronius Galvo STATE codes beginning with 3 are status codes that may occur while feeding energy into the grid, but generally do not cause the process to be interrupted for any length of time.

The inverter disconnects automatically from the grid, the grid is then monitored as specified and the inverter attempts to resume feeding energy into the grid.

Code
Description
Behaviour
Remedy
STATE 301 Overcurrent (AC) Short-term interruption while feeding energy into the grid due to over current in the inverter.
The inverter resumes with its startup routine.
Fault is rectified automatically; if this STATE code is displayed all the time: notify your local Fronius service partner.
STATE 302 Safety circuit detects a current peak on the PV generator side
STATE 303 Power stage set over temperature Short term interruption while feeding energy into the grid due to over temperature.
The inverter resumes with its startup routine.
Purge openings for cooling air and heat sink if necessary; fault is rectified automatically; if this STATE code keeps recurring contact your solar power system installer.
STATE 304 Internal temperature too high
STATE 306 LOW PV OUTPUT
Intermediate circuit voltage too low for feeding energy into the grid
Short term interruption while feeding energy into the grid.
The inverter resumes with its startup routine.
Fault is rectified automatically; if this STATE code occurs when there is sufficient insolation (sunlight) contact your solar power system installer.
IMPORTANT! Due to the low level of insolation (sunlight) early in the morning and in the evening, the STATE codes 306 (LOW PV OUTPUT) and 307 LOW PV VOLTAGE) are displayed routinely at these times of day. These STATE codes do not indicate any kind of fault.
STATE 307 LOW PV VOLTAGE
DC input voltage too low for feeding energy into the grid
STATE 308 Intermediate circuit overvoltage Short term interruption while feeding energy into the grid. The inverter resumes with its startup routine. Fault is rectified automatically; if this STATE code is displayed all the time: notify your local Fronius service partner.
STATE 309 DC input voltage too high

Fronius STATE codes beginning with 4xx

Fronius STATE codes beginning with 4 are error states that require the intervention of a Fronius Service Partner. They are either temporary or lasting and are triggered by faulty hardware or a software problem. Try switching off the Fronius inverter following the system shutdown procedure, leave off for a few minutes then attempt to restart. If the fault continues please contact your local Fronius Service Partner for further assistance.

Code
Description
Behaviour
Remedy
STATE 401 No communication with power stage set possible The inverter will automatically attempt to connect again and, if possible, will resume feeding energy into the grid. If the STATE code is displayed all the time contact your local Fronius Service Partner
STATE 406 Power stage set temperature sensor faulty
STATE 407 Internal temperature sensor faulty
STATE 408 DC feeding into the grid detected
STATE 412 Fixed voltage mode has been selected instead of MPP voltage mode and the fixed voltage has been set to too low or too high a value If this STATE code persists contact your solar power system installer
STATE 415 Safety cut out via option card or RECERBO has triggered The inverter is not feeding any energy into the grid. If the STATE code is displayed all the time contact your local Fronius Service Partner
STATE 416 No communication possible between power stage set and control system The inverter will automatically attempt to reconnect again and, if possible, will resume feeding energy into the grid.
STATE 425 No communication possible with the power stage set
STATE 445 Invalid limit value settings The inverter is not feeding any energy into the grid for safety reasons. Update the inverter firmware; if the STATE code is displayed all the time after the firmware update contact your local Fronius Service Partner.
STATE 452 Communication error between the processors The inverter will automatically attempt to connect again, and if possible, will resume feeding energy into the grid. If the STATE code is displayed all the time: notify your local Fronius Service Partner.
STATE 453 Short term grid voltage error
STATE 454 Short term grid frequency error
STATE 457 Grid relay sticking The inverter is not feeding any energy into the grid. Contact your local Fronius Service Partner.
STATE 459 Error when recording the measuring signal for the insulation test
STATE 460 Reference voltage source for the digital signal processor (DSP) is working out of tolerance
STATE 472 Fuse for solar panel ground is faulty Replace fuse for solar panel ground; if this STATE code keeps recurring contact your solar power system installer.
STATE 475 Solar panel ground, insulation fault (connection between solar panel and ground) If this STATE code keeps recurring, contact your solar power system installer
STATE 482 Startup incomplete Perform AC reset (turn AC circuit breaker off and on), complete startup.

Fronius STATE codes beginning with 5xx

Fronius STATE codes beginning with 5 generally do not stop the feed in operation of the Fronius Galvo inverter. The STATE codes will be displayed until the message is acknowledged by pushing a button on the display (the inverter will work in feed in operation during this time).

Code
Description
Behaviour
Remedy
STATE 502 Insulation error on the solar panels Warning message is shown on the display If this STATE code keeps recurring, contact your solar power system installer.
STATE 509 No energy fed into the grid in the past 24 hours Acknowledge STATE code; check whether all the conditions for the problem free feeding of energy into the grid have been met. If the STATE code is displayed all the time: look out for further STATE codes.
STATE 517 Derating caused by too high a temperature When power derating occurs, a warning message is shown on the display Purge cooling air openings and heat sink if necessary; fault is rectified automatically; if this STATE code keeps recurring contact your solar power system installer.
STATE 551 Fuse for solar panel ground is faulty Warning is shown on display Replace fuse for solar panel ground; if this STATE code keeps recurring contact your solar power system installer.
STATE 558 Functional incompatibility (one or more PC boards in the inverter are not compatible with each other, e.g. after a PC board has been replaced) Possible error displays or malfunction on the inverter If this STATE code keeps recurring contact your solar power system installer.
STATE 560 Derating caused by over-frequency This STATE code is displayed when the grid frequency becomes excessively high. The inverter will then reduce its output. The status indicator will continue to be displayed until the inverter has returned to normal operation. As soon as the grid frequency is back within the permissible range and the inverter has returned to normal operation, the fault is rectified automatically. If this STATE code keep recurring contact your solar power system installer.
STATE 568 Incorrect input signal on the multifunction current interface The STATE code is displayed in the case of an incorrect input signal on the multi-function current interface and with the following setting: Basic menu / Input signal / Mode of operation = Ext. Signal, triggering method = Warning Acknowledge status code; check the devices connected to the multi-function current interface; if this STATE code keeps recurring contact your solar power system installer.

Fronius STATE codes beginning with 6xx

Some of the class 6 STATE codes necessitate intervention by a Fronius Service Partner.

Code
Description
Behaviour
Remedy
STATE 668 Incorrect input signal on the multi-function current interface The inverter is not feeding any energy into the grid. The STATE code is displayed in the acse of an incorrect input signal at the multi-function current interface and with the following setting:
Basic menu / Input signal / Mode of operation = Ext. Signal, triggering method = Ext. Stop
Check the devices connected to the multi-function interface; if this STATE code keeps recurring: notify your local Fronius service partner.

Fronius STATE codes beginning with 7xx

Class 7 STATE codes on Fronius Galvo inverters relate to the control system, the configuration and inverter data recording, and may directly or indirectly affect the process of feeding energy into the grid.

Code
Description
Behaviour
Remedy
STATE 705 Conflict when setting the inverter number (e.g. number already assigned) Correct the inverter number via the setup menu
STATE 721 EEPROM has been reinitialised or EEPROM is faulty Warning message is shown on the display Acknowledge STATE code; If the STATE code is displayed all the time contact your local Fronius Service Partner
STATE 731 Initialisation error – USB stick is not supported Check or replace USB stick. Check the file system on the USB stick. If the STATE code is displayed all the time notify your local Fronius Service Partner.
STATE 732 Over current on USB stick
STATE 733 No USB stick connected Connect or check the USB stick. If STATE code is displayed all the time contact your local Fronius Service Partner.
STATE 734 Update file not recognised or not present Check update file (e.g. for correct file name). If STATE code is displayed all the time contact your local Fronius Service Partner.
STATE 735 Update file does not match the device, update file too old Warning message appears on the display, update process is interrupted. Check update file and if necessary organise an update file to match the device from www.fronius.com. If STATE code is displayed all the time contact your local Fronius Service Partner.
STATE 736 Write or read error occurred Warning message is shown on the display Check USB stick and the data contained on it or replace USB stick.
Never unplug a USB stick if the ‘Data Transmission’ LED is still flashing or lit.
If the STATE code is displayed all the contact your local Fronius Service Partner.
STATE 738 Log file cannot be saved (e.g. USB stick is write protected or full)t Create storage space, remove write protection, check or replace USB stick if necessary.
If STATE code is displayed all the time contact your local Fronius Service Partner.
STATE 743 Error occurred during update process Repeat the update process, check USB stick. If STATE code is displayed all the time contact your local Fronius Service Partner.
STATE 745 Update file corrupt Warning message appears on the display, update process is interrupted. Re-download update file. If STATE code is displayed all the time contact your local Fronius Service Partner.
STATE 751 Time lost Warning message is shown on the display Reset the time and date on the inverter. Check update file (e.g. for correct file name). If STATE code is displayed all the time contact your local Fronius Service Partner.
STATE 752 Real Time Clock module communication error
STATE 757 Hardware error in the Real Time Clock module Error message is shown on the display; the inverter is not feeding any energy into the grid. If STATE code is displayed all the time contact your local Fronius Service Partner.
STATE 758 Internal error: Real Time Clock module is in emergency mode Time may be inaccurate or lost (feeding energy into the grid normal)..
STATE 766 Emergency power de-rating has been activated Error message is shown on the display.

Fronius Galvo solar power inverterFronius is an Austrian manufacturer of solar inverters and are well known for their quality and fast response to warranty claims. If you are on the Gold Coast or South Brisbane and your Fronius Galvo inverter is giving you problems then contact us here or give us a call on 07 55 228 980 – we are here to help ensure that your solar power system remains an asset rather than a liability!

If you are not on the Gold Coast please contact Fronius Tech Support on 03 8340 2910

View Fronius Galvo Manual Here

Got A Question About Solar Power? Click Here For Answers!


The post Fronius Galvo Inverter STATE Codes appeared first on Gold Coast Solar Power Solutions.

Fronius Primo Inverter STATE Codes

$
0
0

Gold Coast Solar Power Solutions are a Fronius Service PartnerGold Coast Solar Power Solutions are a Service Partner for Fronius solar power inverters, so if you’re on the Gold Coast and own a Fronius inverter and it develops a fault you can contact us here and we’ll get your solar power system back in action ASAP.

Gold Coast Solar Power Solutions carry spare parts for Fronius inverters in stock and are trained by Fronius to provide a quick and efficient warranty service, limiting any down time as much as possible. If your inverter is still under warranty the costs will be covered by Fronius.

If you are not on the Gold Coast please contact Fronius Tech Support on 03 8340 2910

View Fronius Primo Manual Here

When a Fronius inverter has a fault it usually comes up with a STATE code to explain what’s wrong; the following table lists the Fronius Primo series inverter STATE codes so you can get an idea on what your Fronius Primo inverter is trying to tell you and what you can do about it.

Fronius Primo Inverter STATE codes

Fronius STATE codes beginning with 1xx

Fronius STATE codes beginning with 1 usually only occur momentarily and are caused by the power from the street (the grid) being outside the inverters operating parameters. The Fronius inverter reacts by disconnecting from the grid and attempts to switch on again after the specified mains monitoring period, as long as no further errors occur during this period. The STATE code is displayed whilst the grid is being checked.

Code
Description
Behaviour
Remedy
STATE 102 AC voltage too high Following careful testing and when the grid conditions are within the permissible range again, the inverter will resume feeding energy into the grid. Check grid connections: If this STATE code keeps recurring contact your solar power system installer.
STATE 103 AC voltage too low
STATE 105 AC frequency too high
STATE 106 AC frequency too low
STATE 107 AC grid outside the permissible limits
STATE 108 Stand alone operation detected
STATE 112 RCMU error

Fronius STATE codes beginning with 3xx

Fronius Primo STATE codes beginning with 3 are status codes that may occur while feeding energy into the grid, but generally do not cause the process to be interrupted for any length of time.

The inverter disconnects automatically from the grid, the grid is then monitored as specified and the inverter attempts to resume feeding energy into the grid.

Code
Description
Behaviour
Remedy
STATE 301 Overcurrent (AC) Short-term interruption while feeding energy into the grid due to over current in the inverter.
The inverter resumes with its startup routine.
Fault is rectified automatically; if this STATE code is displayed all the time: notify your local Fronius service partner.
STATE 302 Overcurrent (DC)
STATE 303 Power stage set over temperature Short term interruption while feeding energy into the grid due to over temperature.
The inverter resumes with its startup routine.
Purge openings for cooling air and heat sink if necessary; fault is rectified automatically; if this STATE code keeps recurring contact your solar power system installer.
STATE 304 Internal temperature too high
STATE 306 LOW PV OUTPUT
Intermediate circuit voltage too low for feeding energy into the grid
Short term interruption while feeding energy into the grid.
The inverter resumes with its startup routine.
Fault is rectified automatically; if this STATE code occurs when there is sufficient insolation (sunlight) contact your solar power system installer.
IMPORTANT! Due to the low level of insolation (sunlight) early in the morning and in the evening, the STATE codes 306 (LOW PV OUTPUT) and 307 LOW PV VOLTAGE) are displayed routinely at these times of day. These STATE codes do not indicate any kind of fault.
STATE 307 LOW PV VOLTAGE
DC input voltage too low for feeding energy into the grid
STATE 308 Intermediate circuit overvoltage Short term interruption while feeding energy into the grid. The inverter resumes with its startup routine. Fault is rectified automatically; if this STATE code is displayed all the time: notify your local Fronius service partner.
STATE 309 DC input voltage MPPT 1 too high
STATE 313 DC input voltage MPPT 2 too high

Fronius STATE codes beginning with 4xx

Fronius STATE codes beginning with 4 are error states that require the intervention of a Fronius Service Partner. They are either temporary or lasting and are triggered by faulty hardware or a software problem. Try switching off the Fronius inverter following the system shutdown procedure, leave off for a few minutes then attempt to restart. If the fault continues please contact your local Fronius Service Partner for further assistance.

Code
Description
Behaviour
Remedy
STATE 401 No communication with power stage set possible The inverter will automatically attempt to connect again and, if possible, will resume feeding energy into the grid. If the STATE code is displayed all the time contact your local Fronius Service Partner
STATE 406 Power stage set temperature sensor faulty
STATE 407 Internal temperature sensor faulty
STATE 408 DC feeding into the grid detected
STATE 412 Fixed voltage mode has been selected instead of MPP voltage mode and the fixed voltage has been set to too low or too high a value If this STATE code persists contact your solar power system installer
STATE 415 Safety cut out via option card or RECERBO has triggered The inverter is not feeding any energy into the grid. If the STATE code is displayed all the time contact your local Fronius Service Partner
STATE 416 No communication possible between power stage set and control system The inverter will automatically attempt to reconnect again and, if possible, will resume feeding energy into the grid.
STATE 417 Hardware ID problem
STATE 419 Unique ID conflict
STATE 421 HID range error
STATE 425 No communication possible with the power stage set
STATE 426-428 Possible hardware fault
STATE 431 Software problem The inverter is not feeding any energy into the grid. Carry out an AC reset (switch the AC circuit breaker off and on); update inverter firmware; if this status code is displayed all the time please contact your local Fronius Service Partner.
STATE 436 Functional incompatibility (one or more PC boards in the inverter are not compatible with each other, e.g. after a PC board has been replaced. The inverter will automatically attempt to connect again and, if possible, will resume feeding energy into the grid. Update inverter firmware; if this status code is displayed all the time please contact your local Fronius Service Partner.
STATE 437 Power stage set problem
STATE 438 Functional incompatibility (one or more PC boards in the inverter in the inverter are not compatible with each other, e.g. after a PC board has been replaced)
STATE 443 Intermediate circuit voltage too low or asymmetric The inverter is not feeding any energy into the grid. If the status code is displayed all the time contact your local Fronius Service Partners.
STATE 445 Invalid limit value settings The inverter is not feeding any energy into the grid for safety reasons. Update the inverter firmware; if the STATE code is displayed all the time after the firmware update contact your local Fronius Service Partner.
STATE 447 Insulation fault If this status code is displayed all the time: notify a local Fronius Service Partner
STATE 448 Neutral conductor not connected
STATE 450 Guard cannot be found
STATE 452 Memory error detected The inverter will automatically attempt to connect again, and if possible, will resume feeding energy into the grid. If the STATE code is displayed all the time: notify your local Fronius Service Partner.
STATE 452 Communication error between the processors
STATE 453 Short term grid voltage error
STATE 454 Short term grid frequency error
STATE 456 Anti-islanding function is no longer implemented correctly
STATE 457 Grid relay sticking The inverter is not feeding any energy into the grid. Contact your local Fronius Service Partner.
STATE 459 Error when recording the measuring signal for the insulation test
STATE 460 Reference voltage source for the digital signal processor (DSP) is working out of tolerance
STATE 461 Fault in the DSP data memory
STATE 462 Error with DC feed monitoring routine
STATE 463 Reversed AC polarity, AC connector inserted incorrectly
STATE 474 RCMU sensor faulty If this STATE code keeps recurring, contact your solar power system installer
STATE 475 Solar panel ground fault, insulation fault (connection between solar panel and ground)
STATE 476 Driver supply voltage too low
STATE 480, 481 Functional incompatibility (one or more PC boards in the inverter are not compatible with each other, e.g. after a PC board has been replaced) Update the inverter software; if the STATE code persists contact your local Fronius Service Partner
STATE 482 Startup incomplete Perform AC reset (turn AC circuit breaker off and on), complete startup.
STATE 483 Voltage UDC fixed on MPP2 string out of limits Check the MPP settings; if the status code is displayed all the time contact your local Fronius Service Partner
STATE 485 CAN transmit buffer is full Carry out an AC reset (turn AC circuit breaker off and on), if the STATE code continues to be displayed notify your local Fronius Service Partner.

Fronius STATE codes beginning with 5xx

Fronius STATE codes beginning with 5 generally do not stop the feed in operation of the Fronius Primo inverter. The STATE codes will be displayed until the message is acknowledged by pushing a button on the display (the inverter will work in feed in operation during this time).

Code
Description
Behaviour
Remedy
STATE 502 Insulation error on the solar panels Warning message is shown on the display If this STATE code keeps recurring, contact your solar power system installer.
STATE 509 No energy fed into the grid in the past 24 hours Acknowledge STATE code; check whether all the conditions for the problem free feeding of energy into the grid have been met. If the STATE code is displayed all the time: look out for further STATE codes.
STATE 515 No communication with filter possible If the status code is displayed all the time notify your local Fronius Service Partner.
STATE 516 No communication possible with the storage unit Storage unit warning message.
STATE 517 Derating caused by too high a temperature When power derating occurs, a warning message is shown on the display Purge cooling air openings and heat sink if necessary; fault is rectified automatically; if this STATE code keeps recurring contact your solar power system installer.
STATE 558 Functional incompatibility (one or more PC boards in the inverter are not compatible with each other, e.g. after a PC board has been replaced) Possible error displays or malfunction on the inverter If this STATE code keeps recurring contact your solar power system installer.
STATE 560 Derating caused by over-frequency This STATE code is displayed when the grid frequency becomes excessively high. The inverter will then reduce its output. The status indicator will continue to be displayed until the inverter has returned to normal operation. As soon as the grid frequency is back within the permissible range and the inverter has returned to normal operation, the fault is rectified automatically. If this STATE code keep recurring contact your solar power system installer.
STATE 566 Arc detector switched off (e.g. during external arc monitoring) The STATE code is displayed every day until the arc detector is reactivated. No error
Confirm status code by pressing ‘Enter’.

Fronius STATE codes beginning with 7xx

Class 7 STATE codes on Fronius Primo inverters relate to the control system, the configuration and inverter data recording, and may directly or indirectly affect the process of feeding energy into the grid.

Code
Description
Behaviour
Remedy
STATE 705 Conflict when setting the inverter number (e.g. number already assigned) Correct the inverter number via the setup menu
STATE 721 EEPROM has been reinitialised or EEPROM is faulty Warning message is shown on the display Acknowledge STATE code; If the STATE code is displayed all the time contact your local Fronius Service Partner
STATE 731 Initialisation error – USB stick is not supported Check or replace USB stick. Check the file system on the USB stick. If the STATE code is displayed all the time notify your local Fronius Service Partner.
STATE 732 Over current on USB stick
STATE 733 No USB stick connected Connect or check the USB stick. If STATE code is displayed all the time contact your local Fronius Service Partner.
STATE 734 Update file not recognised or not present Check update file (e.g. for correct file name). If STATE code is displayed all the time contact your local Fronius Service Partner.
STATE 735 Update file does not match the device, update file too old Warning message appears on the display, update process is interrupted. Check update file and if necessary organise an update file to match the device from www.fronius.com. If STATE code is displayed all the time contact your local Fronius Service Partner.
STATE 736 Write or read error occurred Warning message is shown on the display Check USB stick and the data contained on it or replace USB stick.
Never unplug a USB stick if the ‘Data Transmission’ LED is still flashing or lit.
If the STATE code is displayed all the contact your local Fronius Service Partner.
STATE 738 Log file cannot be saved (e.g. USB stick is write protected or full)t Create storage space, remove write protection, check or replace USB stick if necessary.
If STATE code is displayed all the time contact your local Fronius Service Partner.
STATE 743 Error occurred during update process Repeat the update process, check USB stick. If STATE code is displayed all the time contact your local Fronius Service Partner.
STATE 745 Update file corrupt Warning message appears on the display, update process is interrupted. Re-download update file. If STATE code is displayed all the time contact your local Fronius Service Partner.
STATE 751 Time lost Warning message is shown on the display Reset the time and date on the inverter. Check update file (e.g. for correct file name). If STATE code is displayed all the time contact your local Fronius Service Partner.
STATE 752 Real Time Clock module communication error
STATE 757 Hardware error in the Real Time Clock module Error message is shown on the display; the inverter is not feeding any energy into the grid. If STATE code is displayed all the time contact your local Fronius Service Partner.
STATE 758 Internal error: Real Time Clock module is in emergency mode Time may be inaccurate or lost (feeding energy into the grid normal)..
STATE 766 Emergency power de-rating has been activated Error message is shown on the display.

Fronius Galvo solar power inverterFronius is an Austrian manufacturer of solar inverters and are well known for their quality and fast response to warranty claims. If you are on the Gold Coast or South Brisbane and your Fronius Primo inverter is giving you problems then contact us here or give us a call on 07 55 228 980 – we are here to help ensure that your solar power system remains an asset rather than a liability!

If you are not on the Gold Coast please contact Fronius Tech Support on 03 8340 2910

View Fronius Primo Manual Here

Got A Question About Solar Power? Click Here For Answers!


The post Fronius Primo Inverter STATE Codes appeared first on Gold Coast Solar Power Solutions.


Solar Power Surfers Paradise – Testimonial from Lisa

$
0
0

Lisa from Surfers Paradise: “All the reports I heard on Gold Coast Solar Power Solutions were good and as they were local I chose them. They were prompt, efficient, organised and answered all my questions. Everything went well and I was grateful for the advice and help they gave me. Most of all I liked that they were professional and did what they said they were going to do.”

Solar Power Surfers Paradise - Lisa's 3.5kW Solar Power System

Solar power Surfers Paradise: Lisa’s 3.5kW Solar Power System in Surfers Paradise – proudly installed by Gold Coast Solar Power Solutions.

Solar Power Specifications:

  • System Size: 3.5 kW
  • System Location: Surfers Paradise, Gold Coast, Queensland, Australia
  • Solar Panel Type & Quantity: DAQO 250W x 14
  • Solar Inverter: Sungrow SG3KTL-D

Gold Coast Solar Power Solutions have been installing solar power systems on the Gold Coast and the surrounding areas since 2008. Our friendly team provides no pressure advice to assist you in determining the best system to meet your specific needs in the Surfers Paradise area. To make things easy for you when you have a system installed, Gold Coast Solar Power Solutions organise the changeover of meters in the Surfers Paradise area with Energex.

We also provide system maintenance checks and solar panel-cleaning, solar power system upgrades and additions, as well as repairs and replacements on solar panels and inverters.

If you’re in Surfers Paradise and are after a solar power system, Gold Coast Solar Power Solutions can help you today!

Click here for a FREE, no obligation quotation for solar power from the Surfers Paradise solar power experts.

Gold Coast Solar Power Solutions specialise in:

We are the Gold Coast solar power experts!

Read more solar power testimonials from Gold Coast Solar Power Solutions customers

The post Solar Power Surfers Paradise – Testimonial from Lisa appeared first on Gold Coast Solar Power Solutions.

Sharp JH1600 Inverter Error Codes

$
0
0

Sharp JH1600E inverters D-27 fault codesGold Coast Solar Power Solutions used to be a service agent for Sharp for their JH1600e solar power inverters until Sharp changed their service model, so if you’re on the Gold Coast and own a Sharp inverter and it develops a fault you can contact us here and we’ll get your solar power system back in action ASAP.

View Sharp JH1600e Inverter Manual Here

When a Sharp JH1600 inverter has a fault it usually comes up with a error or event code to explain what’s wrong; the following table lists these codes so you can get an idea on what your inverter is trying to tell you and what you can do about it.

Sharp JH1600 Inverter Fault Codes Beginning with F-

Sharp JH1600 inverter fault codes beginning with F are caused by the power from the street (the grid) being outside the inverters operating parameters. The Sharp JH1600 inverter reacts by disconnecting from the grid and attempts to switch on again after the specified mains monitoring period, as long as no further errors occur during this period. When the grid conditions are again within the inverters operating parameters the inverter should reconnect to the grid and continue operation.

Code
Error Description
F-00 Utility over-voltage
F-01 Utility under-voltage
F-02 Utility frequency over
F-03 Utility frequency under
F-06 Anti-islanding (frequency over)
F-07 Anti-islanding (frequency under)
F-08 Miss utility synchronal lock signal
F-09 Frequency abnormal (50<->60 Hz)

Sharp JH1600 Inverter Fault Codes Beginning with P-

Sharp JH1600 inverter codes beginning with P specify that the voltage coming from the solar panels is outside the inverter parameters.

Code
Error Description
Solar panel array under voltage (<60 V). The screen is blank in this case, as this happens everyday when the sun goes down.
P-11 Solar Panel array over voltage (>320 V)

Sharp JH1600 Inverter Fault Codes Beginning with E- or d-

Is your Sharp JH-1600E showing a D-27 error code on the screen?
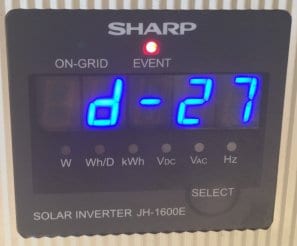
Sharp JH1600 fault codes beginning with E or d are error states that are more serious. These errors always start as E codes but when the fault continues it will change to a d code. They are either temporary or lasting faults and are triggered by faulty hardware or a software problem. Try switching off the inverter following the system shutdown procedure, leave off for a few minutes then attempt to restart. If the fault continues please contact your local solar power experts such as Gold Coast Solar Power Solutions for further assistance.

Code
Error Description
E15 -> d-15 Relay sticking
E16 -> d-16 Communication error
E17 -> d-17 Aux-power abnormal
E18 Ground fault
d-20 Temperature sensor broken
E21 -> d-21 Output over current Learn more about the D-21 error here
E22 -> d-22 DC offset over rating
E23 -> d-23 Fin high temperature
E26 -> d-26 DC/DC converter abnormal
E27 -> d-27 Relay open Learn more about the D-27 error here
E28 DC bus voltage abnormal
d-40 EEPROM abnormal

Fronius Galvo solar power inverterIf you have a Sharp JH1600e inverter that is out of warranty or coming up with a D-27 or D-21 error code the best thing to do is replace the inverter. Gold Coast Solar Power Solutions recommend Fronius inverters as the best replacement for your Sharp inverter.

Fronius are an Austrian manufacturer of solar inverters and are well known for their quality and fast response to warranty claims. If you are on the Gold Coast or South Brisbane and your Sharp inverter is giving you problems then contact us here or give us a call on 07 55 228 980 – we are here to help ensure that your solar power system remains an asset rather than a liability!

View Sharp JH1600e Inverter Manual Here

Got A Question About Solar Power? Click Here For Answers!


The post Sharp JH1600 Inverter Error Codes appeared first on Gold Coast Solar Power Solutions.

Solar Inverter Warranty

$
0
0

At Gold Coast Solar Power Solutions we specialise in after sales service of solar power systems and lately we have seen a disturbing trend with some supposedly “cheaper” solar inverter companies. This trend involves the inverter warranty conditions changing without notice, which doesn’t really seem too legal to me.

As experts in the the maintenance and after sales service of solar power systems the main component of a solar power system that tends to have issues is the solar inverter. As the inverter is the principle source of issues the warranty that the solar inverter has is very important.

The standard warranty on solar inverters is 5 years, but what’s actually covered under that warranty differs between each inverter manufacturer. Some cover parts and labour for any repairs, some cover just parts but not labour, and some cover freight whilst others don’t, and some change their warranties as it suits them which is quite disturbing.

A Disturbing Solar Inverter Warranty Trend

What we have been finding is the warranties have been changing and this isn’t just on inverters installed from today; this trend with certain solar power companies back dates to all inverters already installed.

Lets have a look at a few examples:

Growatt Solar Inverter Warranty:

Growatt inverter warrantyGrowatt are a very large Chinese inverter manufacturer and unfortunately they have recently modified their solar power inverter warranty conditions.

Gold Coast Solar Power Solutions used to be paid by Growatt for replacing a faulty solar inverter that was installed within the standard 5 year warranty but we have recently been informed by Growatt that this has changed – rather than being paid to replace Growatt inverters under warranty we now have to pay Growatt! Here is a brief overview how Growatt warranties have changed:

Original Growatt Inverter Warranty Policy
Current Growatt Inverter Warranty Policy
Inverter warranty claims covered at no cost to customer Inverter warranty claims incur an “operation fee” payable by the customer of $50
Inverter warranty freight costs covered by Growatt Inverter warranty freight costs are payable by the customer

Sharp Solar Inverter Warranty:

Sharp JH1600E inverter warrantySharp are seen as a reputable brand however unfortunately with their solar power inverters they have changed the warranty conditions quite substantially. Gold Coast Solar Power Solutions used to be a service partner with Sharp for their range of solar power products.

We used to have our time for warranty calls covered by Sharp but they have now changed their service model and no longer offer this service. Here is a brief overview how Sharp warranties have changed:

Original Sharp Inverter Warranty Policy
Current Sharp Inverter Warranty Policy
All solar inverter issues covered under warranty. Main issues are no longer covered under warranty.
Service technician paid by Sharp for service calls to site. Service technicians are no longer paid, this cost therefore falls onto the customer.
Warranty freight costs covered by Sharp inverter warranty. Warranty freight costs are no longer covered, therefore passed on to customer.
d-21 errors covered under warranty. d-21 errors are now classed as “extraneous events” and are no longer covered under warranty.
Learn more about the D-21 error here
d-27 errors covered under warranty. d-27 errors are now classed as “extraneous events” and are no longer covered under warranty.
Learn more about the D-27 error here

As you can see the inverter warranty on Sharp solar inverters has changed dramatically in the last few years. I personally don’t understand how a supposedly “reputable” company can get away with this.

Conclusion

This trend is very disturbing, when you purchase a product you don’t expect the warranty to change without notice along the way! I personally cannot see how this is legal but these companies are doing it anyway.

One good thing I suppose is that the manufacturers mentioned above are still around to honour their warranties to some degree unlike companies such as Aero Sharp, Beyond Building, KLNE, CMS, Sunna, Sunny Roo etc.

If you have these inverters and they are out of warranty or nearing the end of the warranty terms and you are having an issue the best thing to do may be just to replace the inverter with a quality replacement. We highly recommend Fronius as a high quality replacement inverter; Gold Coast Solar Power Solutions are a service partner with Fronius and since 2008 we have found that Fronius to be the best solar inverter company in the industry to deal with in the case of a warranty issue.

Need a new solar inverter? Checkout the replacement solar inverters recommended by Gold Coast Solar Power Solutions

Got A Question About Solar Power? Click Here For Answers!


The post Solar Inverter Warranty appeared first on Gold Coast Solar Power Solutions.

Clenergy Solar Inverter Low Power Output

$
0
0

Is your Clenergy solar inverter producing low power?

[contact-form-7]CLENERGY Solar Inverter Low Power Output

A common issue that we have encountered here at Gold Coast Power Solutions with Clenergy solar inverters is a situation where they are producing insufficient power.

The status of the inverter may show that it’s operational and doesn’t have any problem (red fault light is not on). However, what you will notice is that the inverter is producing very low power to nothing at all, while it should be producing a good amount of power.

Possible causes of low power output on Clenergy Solar Inverter

If you are observing the same thing on your Clenergy inverter the first thing to do is to check if there is no shading on your solar panels. Should there be no issues with shade then the possible causes of low power output on a Clenergy solar inverter could be:

  1. Problem with the DC Isolator or the cables on the Solar DC side
  2. Problem with the solar panels on the roof
  3. Problem on the solar inverter itself

Either way, it’s going to be best to get a professional solar accredited electrician to check out the system and have look into the cause of the issue for you.

What can you do to troubleshoot a low power output on your Clenergy solar inverter?

Try rebooting your solar inverter by following the system shut down procedure:

  1. Turn off the SOLAR SUPPLY MAIN SWITCH of Inverter AC Isolator.
  2. Turn off the PV ARRAY DC Isolator beside the inverter.
  3. Wait for approximately 1 minute.
  4. Turn on the AC Isolator.
  5. Turn on the PV ARRAY DC Isolator.
  6. Wait until the power light is on and check that the screen displays the expected power output.

If the above procedure does not solve the low power issue, we recommend contacting a professional solar accredited electrician.

Our form is readily available on this page. Simply fill it in with your details. Once submitted, our team will organize a local solar power professional for further assistance.

Click here to get your solar power system back saving you money rather than costing you money!

Got A Question About Solar Power? Click Here For Answers!

The post Clenergy Solar Inverter Low Power Output appeared first on Gold Coast Solar Power Solutions.

Eversolar Solar Inverter Utility Loss

$
0
0

Is your Eversolar Solar Inverter displaying Utility Loss on its screen?

[contact-form-7]Eversolar Solar Inverter Utility Loss

As we have been servicing various customers here at Gold Coast Power Solutions, one of the most common issues that we are encountering with Eversolar solar inverters is it being unable to detect any power.

Instead of showing a green light, the inverter appears to have a red light lit. It also shows a “Utility Loss” message on the screen display, which means that the inverter is not detecting any power from the electricity grid.

As soon as you see this message it’s a good idea to do something about it to ensure your solar power system is working and saving you money.

What can you do to troubleshoot a Utility Loss message on your Eversolar solar inverter?

There are a few things that you can check first:

  • If there is an AC isolator installed beside the inverter, it should be turned ON
  • the SOLAR SUPPLY MAIN SWITCH for the inverter in your switchboard should also be ON, and
  • the AC plug beneath the inverter should be correctly plugged into the inverter

If these are all as they should be, the inverter should no longer display the Utility Loss message.
If the issue persists, you will need to contact a solar accredited electrician to have a look at your Eversolar solar inverter issue, as they will need to carry out some further tests.

If you need any further assistance with your Eversolar solar inverter utility loss issue, just complete the form on this page with your details so our team can provide you with further assistance.

Click here to get your solar power system back saving you money rather than costing you money!

Got A Question About Solar Power? Click Here For Answers!

The post Eversolar Solar Inverter Utility Loss appeared first on Gold Coast Solar Power Solutions.

KLNE Sunteams Solar Inverter  – Disconnect Grid

$
0
0

Is your KLNE Sunteams solar inverter displaying a Disconnect Grid message on the screen?

[contact-form-7]KLNE Sunteams Disconnect Grid

At Gold Coast Power Solutions we aim to help customers who encounter issues with their KLNE Sunteams solar inverter. A common issue that we have seen is when the KLNE Sunteams solar inverter displays Disconnect Grid on the screen.

With this issue, you will notice that the red fault light is lit, indicating that the inverter has detected a fault. You will also notice that the display message shows a “Disconnect Grid” message, which means that the inverter is not detecting power from the electricity grid or power from the switchboard.

As soon as you see these indications, you’ll want to take action to get your KLNE Sunteams solar inverter back in action.

Troubleshooting a Disconnect Grid screen display on your KLNE Sunteams solar inverter

There are a few things that you can check first:

  • If there is an AC isolator installed, check that it is ON
  • Check the SOLAR SUPPLY MAIN SWITCH in your switchboard is ON
  • Check plugs underneath the inverter are all connected.

After checking the above and ensuring that there’s no power failure from the grid and you are still having this issue then you will need to contact a solar accredited electrician to check your system.  They will check for further issues with the inverter or the cables back to the switchboard.

First thing that they will do is to pull out the AC plug and check if it’s generating 240 volts. This will help us to ascertain where the issue lies – either an internal problem with the inverter itself, or a problem somewhere with the cables back to the switchboard.

If you are encountering this type of problem with your KLNE Sunteams solar inverter, we can help! Just fill in the form on this page with your details and we will be in touch.

Click here to get your solar power system back saving you money rather than costing you money!

Got A Question About Solar Power? Click Here For Answers!

The post KLNE Sunteams Solar Inverter  – Disconnect Grid appeared first on Gold Coast Solar Power Solutions.

Macsolar Solar Inverter Fault Light

$
0
0

Is your Macsolar Solar Inverter Fault light on?

[contact-form-7]Macsolar Solar Inverter Fault Light

Here at Gold Coast Power Solutions we have seen a number of cases where Macsolar solar inverters have the red fault light lit when the system should be operational.

If working properly, the inverter should display a green power light and a yellow run light. With the fault light issue, although the green power light is on you’ll also notice that the red fault light is lit as well and the run light is not on.

This means that your inverter is still detecting DC solar power from the roof but it has also detected a fault with the system.

As soon as you notice this issue with your Macsolar solar inverter you want to do something about it because the system is not working at all.

Troubleshooting a fault light on your Macsolar solar inverter

In this situation, try to restart the inverter by following the system shutdown procedure.

  1. Turn off the SOLAR SUPPLY MAIN SWITCH located in the switchboard.
  2. Turn off the PV ARRAY DC Isolator beside the inverter.
  3. Wait for approximately 30 seconds to 1 minute.
  4. Turn on the SOLAR SUPPLY MAIN SWITCH.
  5. Turn on the PV ARRAY DC Isolator.
  6. Wait until the power light is on.

Unfortunately the Macsolar company is no longer in business which means that warranty claims are no longer possible for any Macsolar inverter. If restarting the inverter hasn’t solve this issue, the next two options are:

  1. Repair the inverter, or
  2. replace it.

If you choose to go for the first option (repairing the inverter), it may well cost over $500. This will still leave you with an inverter ofinferior quality and no warranty, so it may be best to choose to have the Macsolar inverter replaced with a quality replacement unit.

We recommend replacing the inverter with a quality replacement unit with a full warranty, if you require further assistance with this just fill in the form on this page with your details and we will be in touch.

Click here to get your solar power system back saving you money rather than costing you money!

Got A Question About Solar Power? Click Here For Answers!

The post Macsolar Solar Inverter Fault Light appeared first on Gold Coast Solar Power Solutions.


Eversolar Solar Inverter Relay Check Fail

$
0
0

Is your Eversolar Solar Inverter showing a Relay Check Fail message?

[contact-form-7]Eversolar Solar Inverter Relay Check Fail

Unfortunately here at Gold Coast Power Solutions we have seen the “Relay Check Fail” message many timers on Eversolar solar inverters.

With this issue, the inverter keeps trying to reboot itself.  The “Relay Check Fail” message will then appear on the display screen, then the restart process will start again. This will keep going on and on, you will also notice that the the red LED light is lit, which means that the inverter has detected a fault. An Eversolar inverter working properly should display a green light and should not have the red light lit.

If you are experiencing this issue in your Eversolar solar inverters, you’ll need to do something about it ASAP as your inverter is currently not working.

Troubleshooting an Eversolar solar inverter Relay Check Fail

If the inverter is still within the 5-year warranty and you have proof of purchase documentation then Eversolar should cover this issue under warranty. If you wish to take this option, you will need to present the proof of purchase of when it was originally installed, the model number and serial number found on the side of the inverter.

Just take note though that Eversolar tends to take a while to service warranty claims, usually you will be waiting a month or so.

If your inverter is out of warranty or you are not prepared to wait for the unit to get fixed, the next best option is to have the inverter replaced with a good quality unit with a full factory warranty.

If you need any further assistance with your Eversolar solar inverter relay failure issue just complete the form on this page with your details so our team can provide you with further assistance.

Click here to get your solar power system back saving you money rather than costing you money!

Got A Question About Solar Power? Click Here For Answers!

The post Eversolar Solar Inverter Relay Check Fail appeared first on Gold Coast Solar Power Solutions.

Clenergy GFCI Fault

$
0
0

Is your Clenergy solar inverter displaying a red light and a GFCI Fault message on the screen?

[contact-form-7]Clenergy GFCI Fault on Clenergy Solar Inverter

Clenergy Inverter GFCI Fault Message

At Gold Coast Solar Power Solutions we’ve seen a large number of Clenergy inverters displaying the GFCI Fault message, it can be displayed on all the Clenergy inverter models although the SPH15, SPH20 amd SPH30 models are the main ones that seem to have the issue around the Gold Coast and Brisbane areas.

In each case according to the Clenergy solar inverter manual the GFCI Fault means Ground Fault Current Interrupt Fault. Now isn’t that helpful to know?! What it means in English is the Clenergy inverter has detected a fault whereby is detecting a ground fault with the system, and as this is a major issue it shuts the inverter down for safety. In our experience usually this is an internal fault with the inverter rather than an issue with any other part of the system but it will require a check by an accredited solar power installer.

What can you do about a Clenergy GFCI Fault?

The first thing you can try is rebooting the system:

  1. Turn OFF the Solar Supply Main Switch in the switchboard
  2. Turn OFF the PV Array DC Isolator beside the inverter
  3. Wait for the Clenergy inverter screen to go blank and then a few more seconds
  4. Turn the PV Array DC Isolator beside the inverter back ON
  5. Turn the Solar Supply Main Switch in the switchboard back ON
  6. Wait for the inverter to reboot
  7. See if the GFCI Fault has cleared

If the reboot has not cleared the GFCI Fault then it looks like you will require the assistance of a professional solar power accredited electrician. Please fill in your details on the form on this page and we will organise your local solar power professional to provide you with further assistance.

Click here to get your solar power system back saving you money rather than costing you money!

Got A Question About Solar Power? Click Here For Answers!

The post Clenergy GFCI Fault appeared first on Gold Coast Solar Power Solutions.

Battery Ready Solar Power Systems

$
0
0

In the solar power industry the latest thing that everyone wants is a battery ready solar power system, and many companies are scrambling over each other to provide solar power solutions which, we are told, are “battery ready.”

How a solar power system with a battery bank works

The term “battery ready solar power system”

For 2016 it looks like it’s the new catch cry of solar power sales people, yes I can assure you that this solar power system is battery ready! But buyer beware, as the term battery ready is a very loose and open ended term, as okay you may one day be able to connect a battery bank to your solar power system but just how much work and additional components will that require? Will it just be a matter of buying a compatible battery bank to connect into the system or will thousands and thousands of additional dollars be required to actually get the battery bank to work with your system?

You see the issue here is that in both cases a solar power system can be called “battery ready” by a sales person but the difference is in how much extra work and components are required to actually get the solar power system working in conjunction with a battery.

What’s required for a solar power system to be really battery ready?

Solar panels – this ones pretty obvious, for a solar power system to be what it is you need solar panels!

Fronius Symo Hybrid Battery Ready Solar InverterSolar Inverter – this is one of the areas where everything gets a bit grey. There are hybrid solar inverters on the market which are the most battery ready inverters available. For 3 phase supplies we recommend the Fronius SYMO hybrid inverter, for single phase systems we recommend the SolarEdge StorEdge solar inverter.

DC Coupled Battery Ready Solar Power Systems
Both these solar inverters are designed to be “DC coupled” to a battery bank such as the Tesla PowerWall; this is the most efficient way to connect a battery bank as the system is designed to take the DC solar power generated by the solar panels and send it onto the batteries as DC power.

AC Coupled Battery Ready Solar Power Systems
Most other solar inverters out there which can connect to battery banks and may be classed as battery ready use what’s called an “AC coupled” system to take the power from your solar panels to the battery. This is quite inefficient as the DC power from the solar panels is converted by the inverter into AC power, then back to DC power to charge the batteries. When the power stored in the batteries is required it is then once again converted from DC to AC for use. Each of these conversions from DC to AC and AC to DC lowers the efficiency of the system which is why it’s not recommended as the best option for a battery ready solar power system.

Selectronic SP Pro inverters can be used to make solar power systems battery readyMost of the leading grid connect solar inverters on the market can potentially be called “battery ready” as they can be connected to additional products which can then be used to charge batteries, however these additional products are not cheap! For example an SMA SunnyBoy solar inverter can be connected to another SMA product, the Sunny Island and then connect to batteries, however this would cost over $6000 extra on top of your original system to connect to batteries – that’s before the additional cost of the batteries! ABB Aurora inverters can work in a similar way with a Selectronic SP Pro on grid inverter, but once again it is going to cost you around $6000 to set this up on top of your original system price before you even look at adding batteries.

Electricity Meter – this is not your standard meter that your power company reads but a separate electricity meter which communicates with your battery control system to tell Battery ready solar power systems require an electricity meter such as the Fronius smart meter the batteries what to do. It constantly monitors the power consumption of your property and this important data is used to tell the inverter what to do with the power from the batteries and from the solar panels. If the solar power system is producing more power than your property is consuming it will automatically send the required solar power to be used to power your appliances and send the surplus power to charge the batteries. If the property starts using more power than the solar is providing it will draw the additional power as required from the batteries. Obviously this electricity meter is a crucial component to maximise the self consumption of your solar power; if you are wanting your solar power system to be battery ready we highly recommend getting the electricity meter to suit the battery storage system initially, as the data that this meter provides will help you select the optimum sized battery when you are ready to look at them.

In conclusion – battery ready solar power systems

As we have discussed many standard grid connect solar power systems can be called “battery ready” however if you ever wanted to upgrade the system to actually work with batteries you would be looking at potentially more than $5000 in additional costs to get the system ready to work with batteries; and that cost is before the cost of batteries.

At Gold Coast Solar Power Solutions we highly recommend if you want to install a solar power system that is truly “battery ready” to initially install an inverter system which can be DC coupled to the batteries such as the 3 phase Fronius SYMO hybrid inverter system or the Single phase SolarEdge StorEdge solar inverter. This will be the most efficient system which is ready for any future technological advances – DC coupled systems are the future without a doubt. We also highly recommend installing an electricity meter with the initial installation as it will provide valuable data on your power requirements and will be invaluable in sizing the optimal battery storage to go with your solar power system – a system that is truly battery ready!

Got A Question About Solar Power? Click Here For Answers!

The post Battery Ready Solar Power Systems appeared first on Gold Coast Solar Power Solutions.

Eversolar Solar Inverter Isolation Fault

$
0
0

Is your Eversolar Solar Inverter displaying an Isolation Fault message on the screen?

[contact-form-7]Eversolar Solar Inverter Isolation Fault

Issues with Eversolar Solar Inverters displaying Isolation Fault messages are something we have seen a number of times here at Gold Coast Solar Power Solutions.

When there is an isolation fault issue with your Eversolar inverter a red alarm light will be lit whilst the green run light beside it is off. In normal operating conditions the green light would be solidly lit if the inverter. The Isolation Fault message means that the inverter has detected an isolation fault: this could be an internal fault with the inverter or a fault with the solar system cables or wiring.

If you see an isolation fault error message on your Eversolar solar inverter it means the system is not working – you need to take action!

What can you do about an Eversolar Solar Inverter Isolation Fault Issue?

If this happens to your Eversolar solar inverter the best thing to do is to try rebooting the system to see if this clears the issue by following the shutdown procedure below.

  1. Turn off the SOLAR SUPPLY MAIN SWITCH located at your switchboard or the Inverter AC Isolator.
  2. Turn off the PV Array DC Isolator located at the inverter.
  3. Wait for approximately 1 minute.
  4. Turn on the AC Isolator and / or Solar Supply Main Switch.
  5. Turn on the PV ARRAY DC Isolator.
  6. See if the inverter successfully starts up after the reboot.

If this issue continues you will need to get a solar accredited electrician to check your solar power system. They will further investigate if the problem is a fault in the inverter or on the cables connected to it.

If the inverter is still within the 5-year warranty period, take note of the model number and the serial number found on the right side of the inverter. If for some reason the model number is no longer visible, this can also be found by navigating through the inverter display by pressing the button of the inverter.

If your inverter is outside the 5 year warranty period then we recommend having it replaced with a good quality unit rather than throwing more money at it. You can easily throw $500 at an inverter in an attempt to fix it and after all that you would still have a product without a warranty! It makes more sense economically to pay a little more and get a new brand new, quality inverter with a full factory warranty.

If you need any further assistance with your Eversolar Solar Inverter Isolation Fault issue, just complete the form on this page with your details. We’re here to help!

Click here to get your solar power system back saving you money rather than costing you money!

Got A Question About Solar Power? Click Here For Answers!

The post Eversolar Solar Inverter Isolation Fault appeared first on Gold Coast Solar Power Solutions.

Samil Solar River Inverter No Utility

$
0
0

Is your Samil Solar River inverter displaying a No Utility message on the inverter screen?

[contact-form-7]Samil Solar River Inverter No Utility

There are several issues that we have seen with Samil solar inverters here at Gold Coast Power Solutions. A common issue is for the Samil solar river inverter to display a “No utility” message with the red fault light lit.

If your Samil inverter is displaying a No Utility message on the screen it means that the inverter has not detected any power from the electricity grid and therefore the system is not working – you need to take action ASAP!

What can you do about a Samil Solar River Inverter No Utility message issue?

The first thing to do with a No Utility message is to check if all the switches are turned ON, such as the:

  • AC Isolator beside the inverter (if applicable) and the
  • Solar Supply MAIN SWITCH located on the switchboard

If you find one of these switched was turned off then turning it back on should clear the message on the Samil solar river inverter and get it up and running again. If this doesn’t work you will need to call a local accredited solar electrician. They will check if there’s power getting to the inverter and ascertain whether the issue is in the inverter itself, or in a switch or a problem with the AC cabling.

If the solar electrician works out that there is grid power from the switchboard going to the inverter, then this means that the issue is in the inverter.

If your inverter is installed in the last 5 years, then it’s still within the warranty period. If not, rather than have the inverter repaired and throw some good money, we recommend getting a good quality replacement unit which will last longer and will have full warranty back it up.

For additional information with your Samil Solar River Inverter No Utility issue, just complete the form on this page with your details so our team can reach out to you for further assistance.

Click here to get your solar power system back saving you money rather than costing you money!

Got A Question About Solar Power? Click Here For Answers!

The post Samil Solar River Inverter No Utility appeared first on Gold Coast Solar Power Solutions.

Viewing all 154 articles
Browse latest View live